Table of Contents
Once you have the account created, log into Backup Ninja and go to Servers → Add Server to add a database server into Backup Ninja. This basically means to install and configure Backup Ninja agent on the server.

The steps to add a new server are explained in the following subsections.
1) Select Database
Choose the database technology that you want to back up. You can choose between a wide range of supported database engines for both SQL and NoSQL databases.
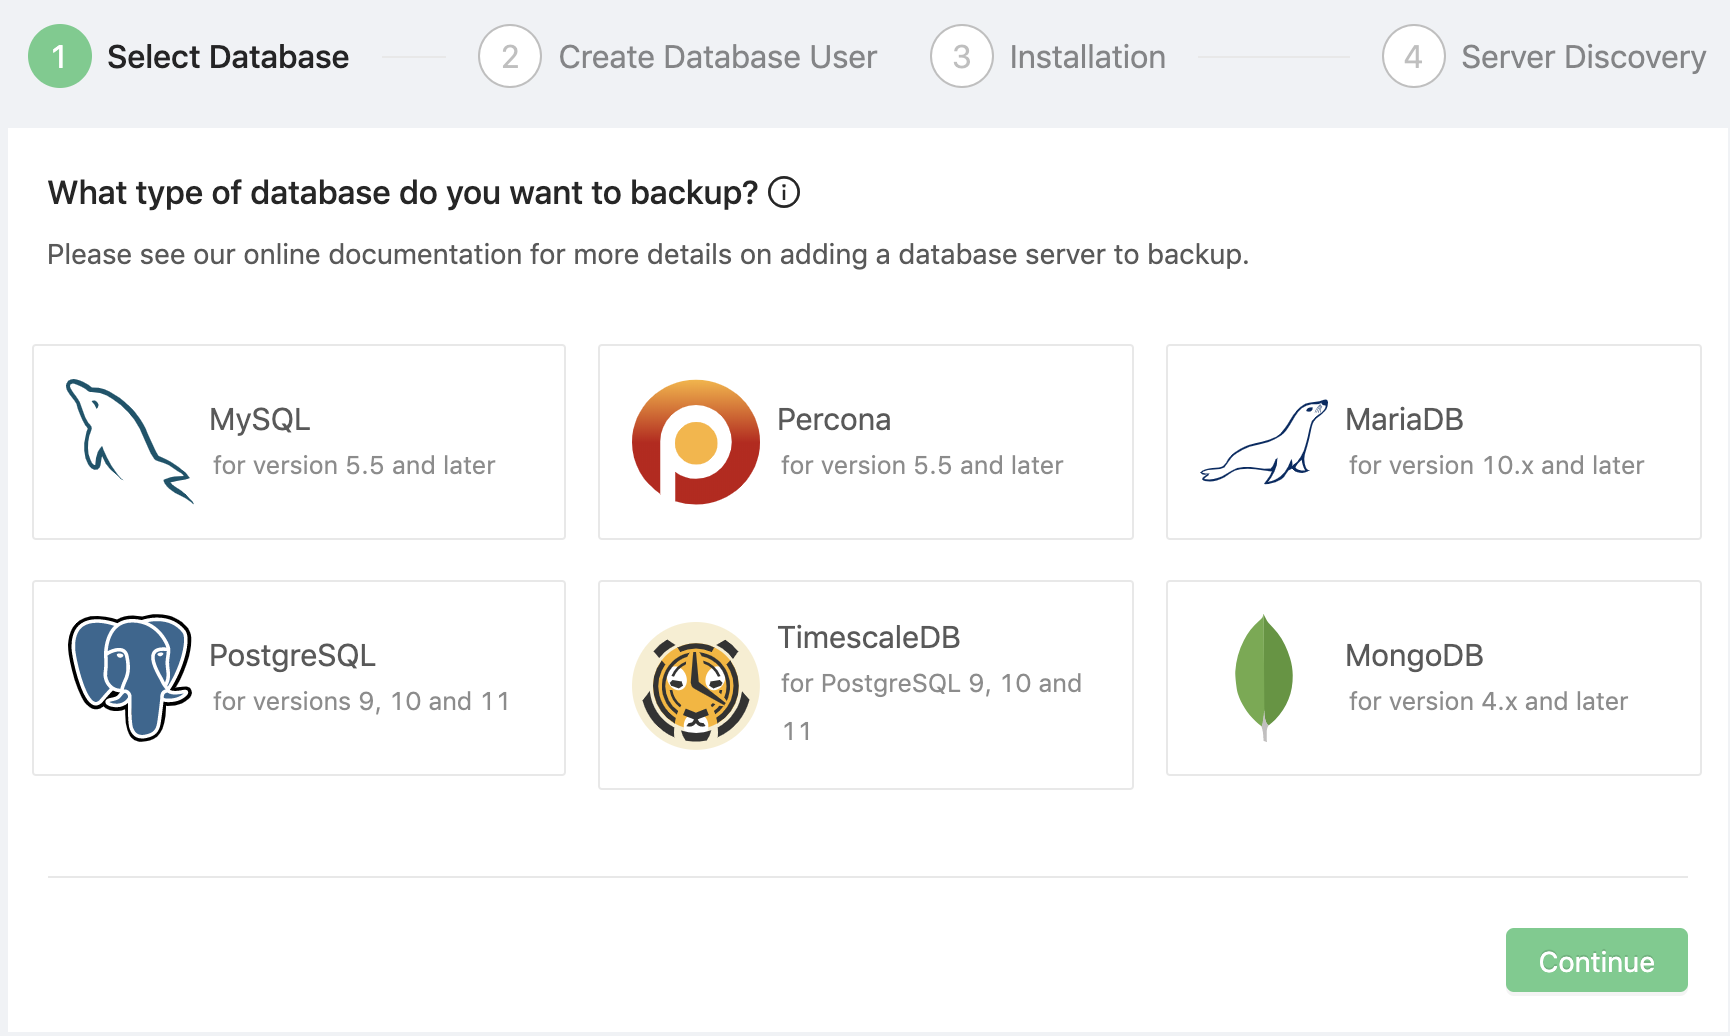
- MySQL Server version 5.5 and later
- Percona Server for MySQL version 5.5 and later
- MariaDB Server version 10.0 and later
- PostgreSQL version 9.6 and later
- TimescaleDB version 9.6 and later
- MongoDB version 4.0 and later
Click on the respective database vendor and version and click
2) Create Database User
In this step, you will get a set of commands to be executed on the database server to allow the Backup Ninja agent to connect to the database.
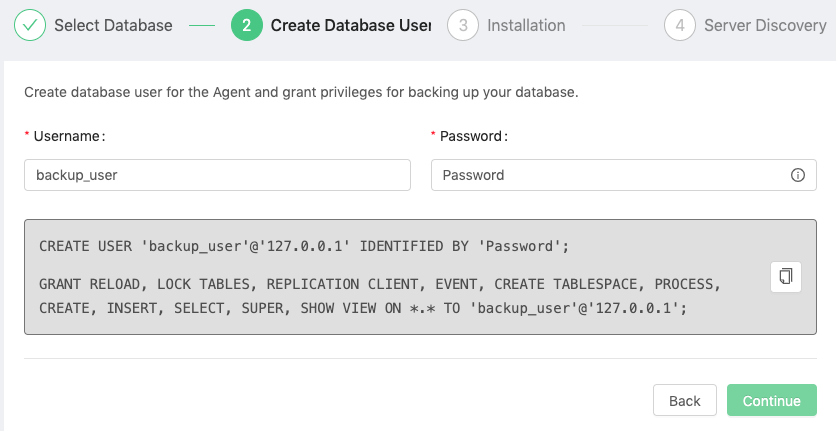
Copy the commands and execute them on the database server with a privileged user like root or super admin. Click
For more details on user privileges and roles for Backup Ninja usage, see Create Database User.