Table of Contents
Taking Point-in-time Recovery (PITR) for MySQL Server/Percona Server/MariaDB Server is simply straight forward just like how you schedule your backup for MySQL Server/Percona Server/MariaDB Server.
A PITR in Backup Ninja using MySQL Server/Percona Server/MariaDB Server works once you are performing a full backup using mysqldump and by enabling PITR during the scheduling of backup.
Prerequisites before taking a PITR backup
To perform a PITR capable backup, you are required to at least enable the following configuration variables by MySQL-based database. These are the following:
- Enabling Binary Logging for MySQL:
- server-id must be specified, otherwise the server is not allowed to start. Set unique replication ID in the range from 1 to 4294967295.(eg.: server-id = 1)
- set log_bin as the path that should be used as Binary Logs Location.(eg.: log_bin = /var/log/mysql/mysql-bin.log)
- restart MySQL server.
This can be seen in our configuration wizard during enabling PITR.
Creating your PITR backup
In creating your PITR backup, it is expected that you have already created or added your Server. Let’s go over the steps on how to do this.
1.) Schedule a Backup
From the Backup Ninja dashboard, go to Schedules → Schedule Backup and follow the configuration wizard. You can check our How-To page on how to schedule a backup for MySQL/Percona Server/MariaDB
2.) Choose mysqldump as your backup method
At this point, you are now in the Details tab under the configuration wizard. Make sure that you have selected correctly your target MySQL/Percona Server/MariaDB server that you have already created or added. Afterwards, simply choose the mysqldump as the backup method just like as what is shown below:

When enabling PITR, you are required to at least specify the configuration variables for MySQL-based databases which are server-id and log-bin. Please check our user guide page regarding PITR.
3.) Specify the binary log location
Once you have enabled the required parameters or configuration variables as stated in our user-guide for PITR, you have to determine and use that binary log location where it is stored. You can verify this by running the following query,
mysql> show global variables like 'log_bin_basename';
+------------------+---------------------------+
| Variable_name    | Value                     |
+------------------+---------------------------+
| log_bin_basename | /opt/mysqlbinlogs/log_bin |
+------------------+---------------------------+
1 row in set (0.00 sec)
In the example above, the location of my binary logs are stored in /opt/mysqlbinlogs. Keep in mind that the log_bin is the base filename. For example, here are the list of binary logs in that path:
$ ls -alth /opt/mysqlbinlogs/
total 20K
-rw-r----- 1 mysql mysql 156 May 24 16:36 log_bin.000002
drwxr-xr-x 2 mysql mysql 4.0K May 24 16:36 .
-rw-r----- 1 mysql mysql 66 May 24 16:36 log_bin.index
-rw-r----- 1 mysql mysql 179 May 24 16:36 log_bin.000001
drwxr-xr-x 4 root root 4.0K May 24 16:35 ..
To specify the binary log location, simply copy paste the directory or path where your binary logs are stored. For example,

4.) Clear Binary Logs location after each backup to save space
Lastly, this option is optional for you to decide. This means that, whenever the Backup Ninja finishes taking a backup of the binary log, Backup Ninja will clear or remove that binary log from its original location to free up space. That means, if you have log_bin.000001 up to log_bin.000010, if these binary logs have been finished backup by the Backup Ninja, it will be removed from its original location, for example, from /opt/mysqlbinlogs. Since it shall remove the file, you have to think of this carefully unless you have decided that is the desired choice for your binary logs once it has been back up. To do this, simply check the checkbox as follows,

Now that you are good to go, just hit the [keybtn]Continue[/keybtn] and proceed on the next tab Storages.
Determining and viewing your PITR enabled backups
To determine your PITR enabled backups, go over to the Schedule List of your backups. Now choose the name of your scheduled backup for which the PITR is enabled. See the example scheduled backup below,
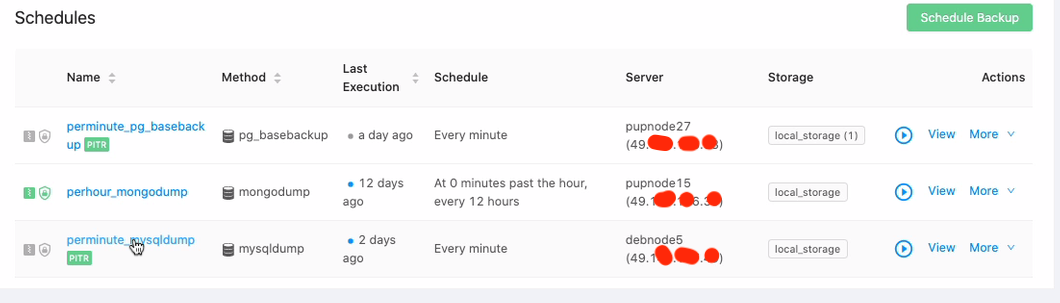
PITR label so it’s easy to identify which one of your backup has PITR enabled.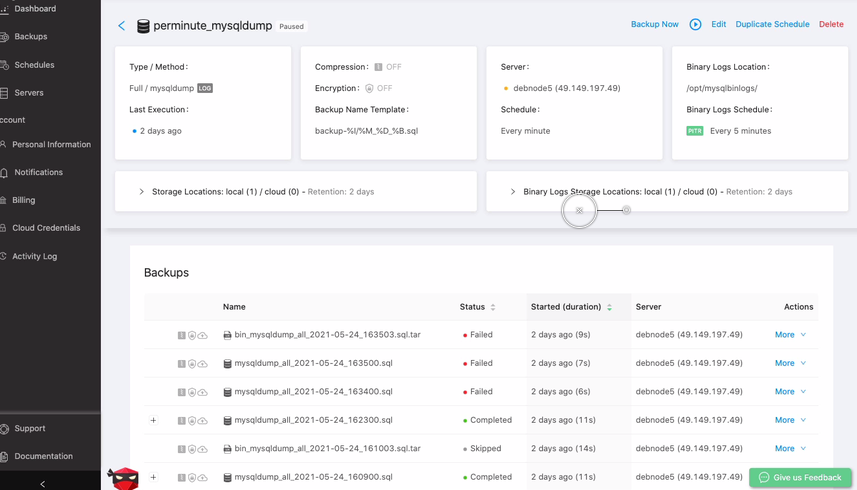
You get the full list of your backups and these are paginated. If you have lots of backup listed, you can navigate in accordance to its page selected.
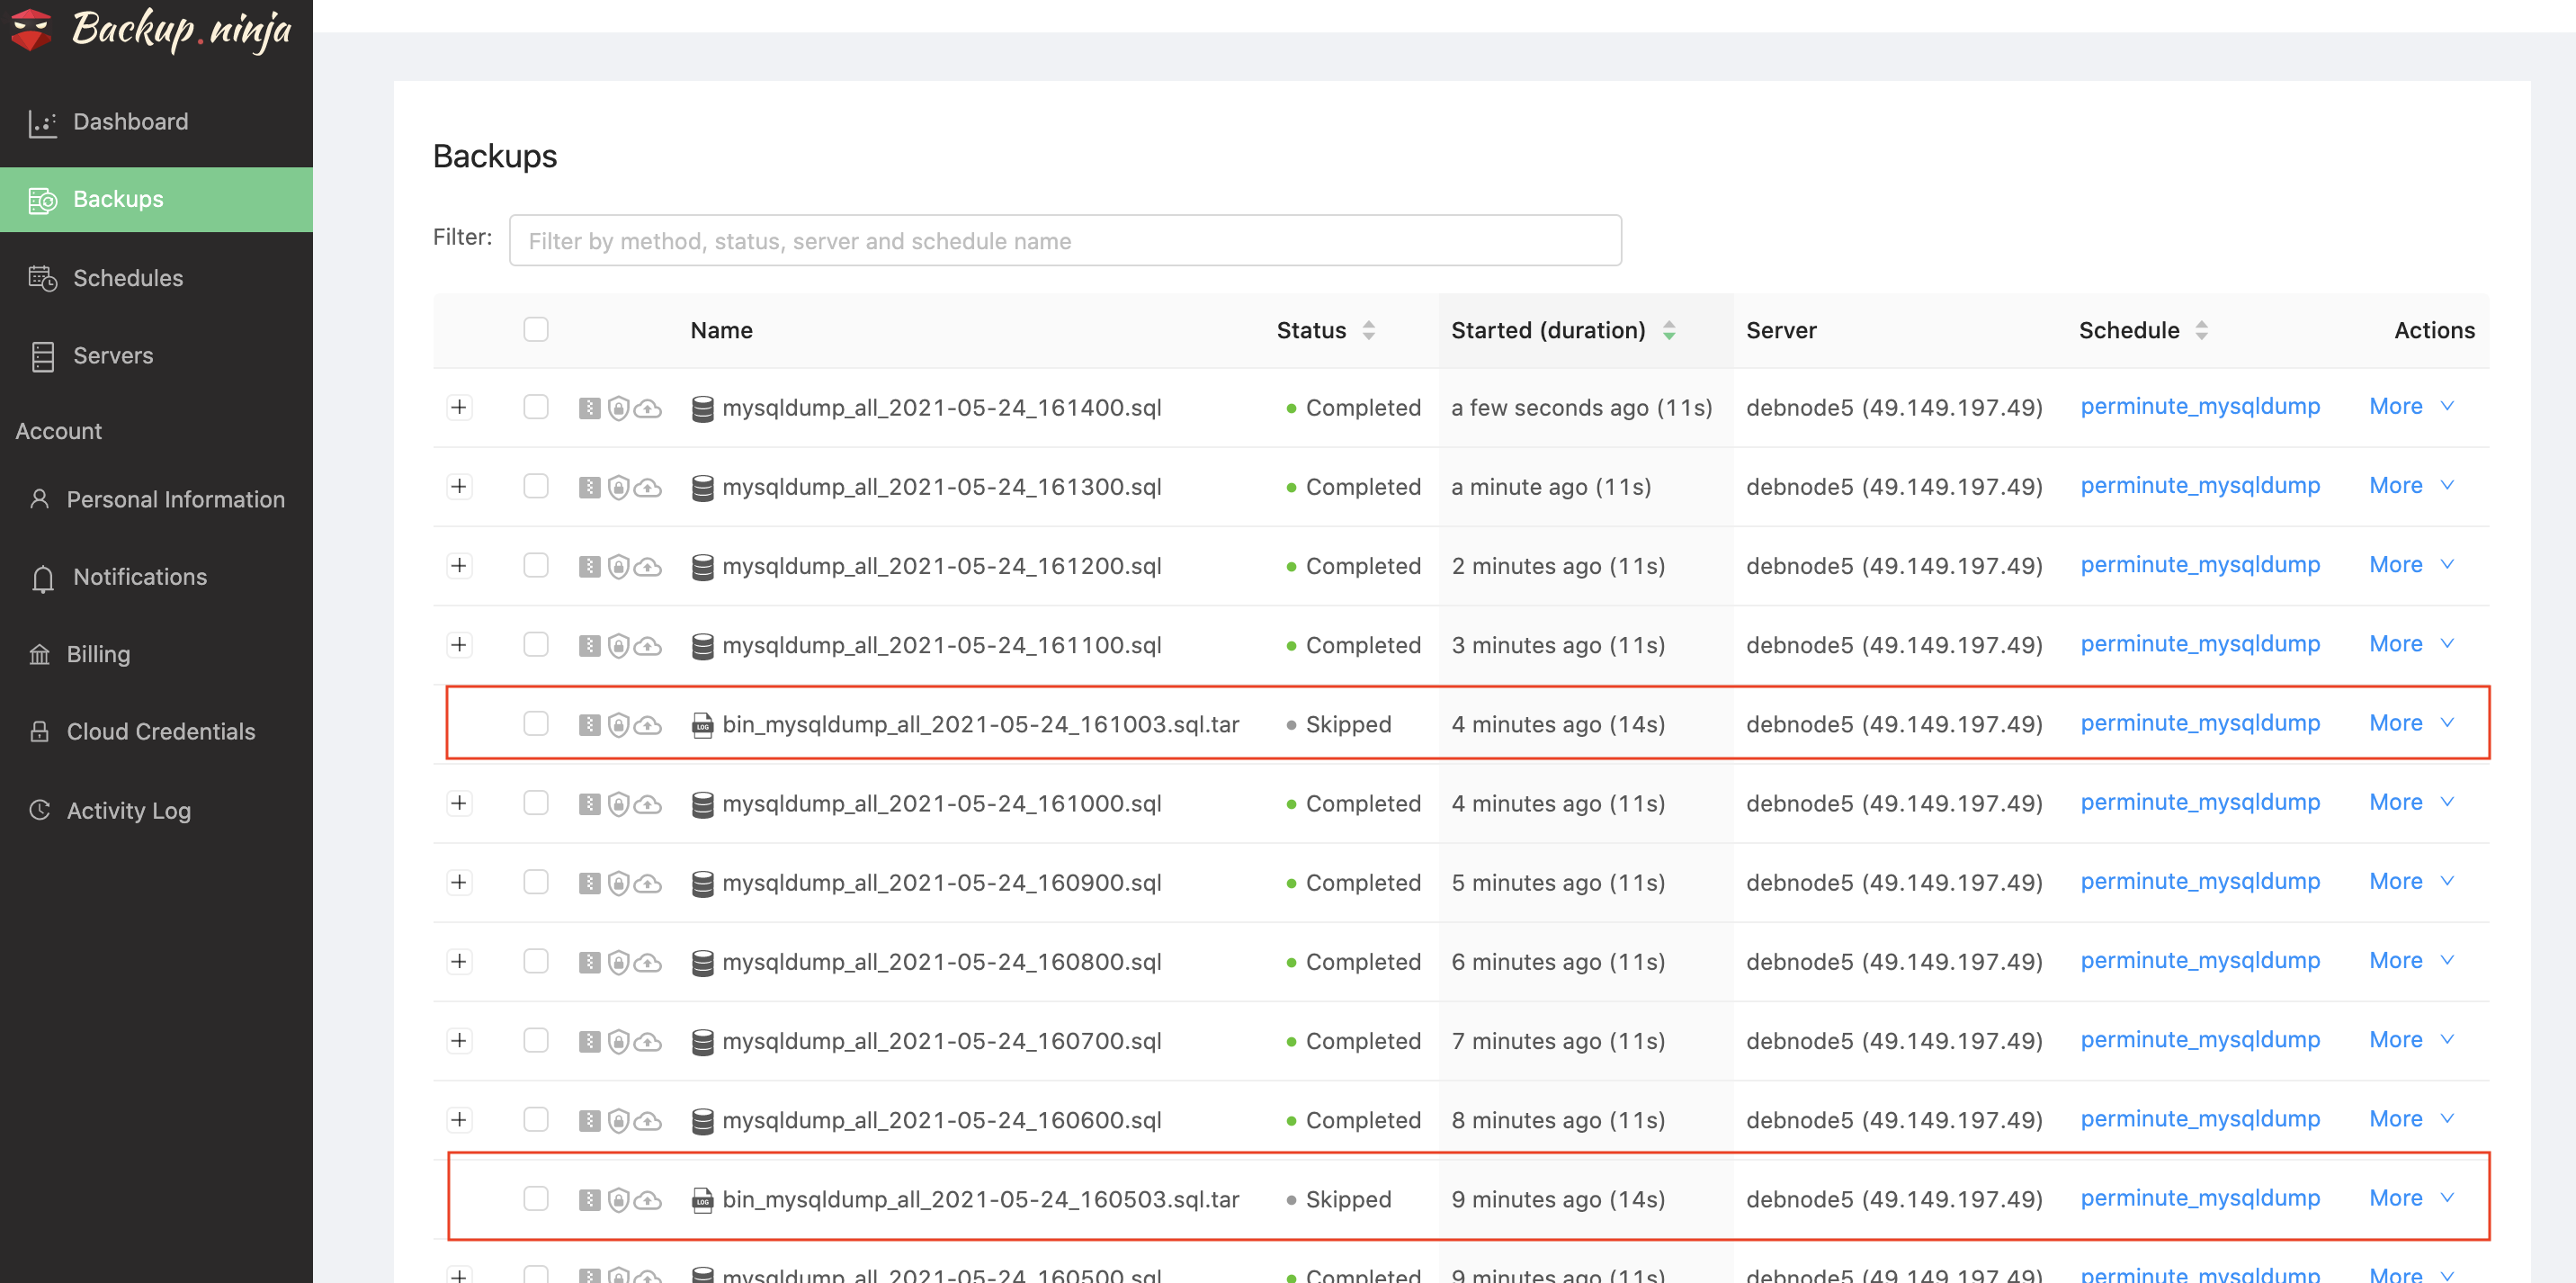
Alternatively, your PITR backups will be listed by going to Backup Ninja → Backups in the left panel navigation. See our user guide to know how to list your backups. To determine the PITR backups among the full backup or other backups you have, the backup name shall be prefixed with <strong>bin</strong>. See the screenshot below,

There are times that your MySQL-based database is not performing any large writes or say your MySQL/Percona Server/MariaDB server is place into a dormant state for some time, then any Backup Ninja actions has to be made shall be skipped since there’s no any writes or no previous changes have been identified from your MySQL-based database server. If you have checked to clear your binary logs after it has been backup, then simply the action to take the backup can be skipped since there are no binary logs to be back up. See screenshot below: