Table of Contents
This section provides a description of how to create cloud credentials for Backup Ninja.
Creating Cloud Credentials
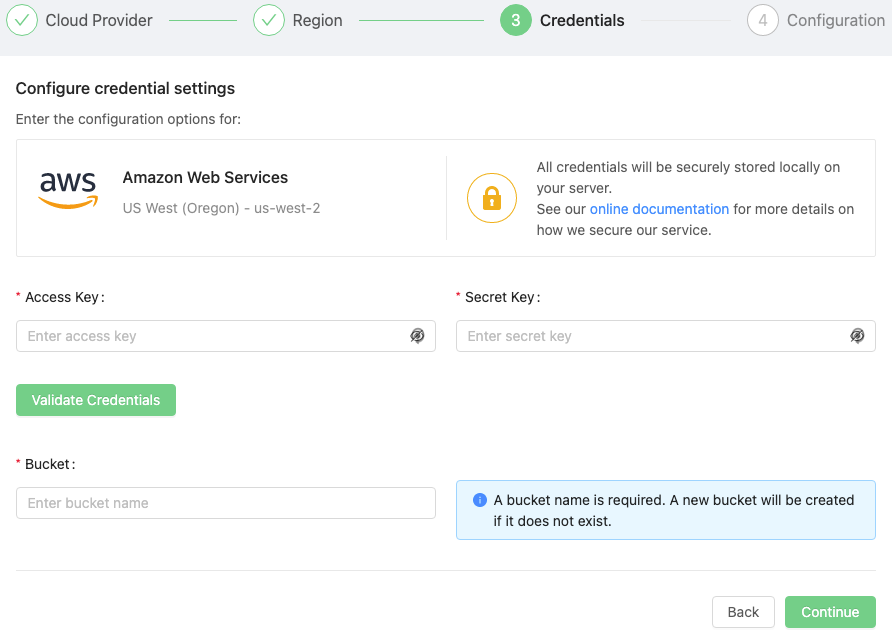
Amazon Web Services
- In the AWS Management Console, go to the
IAMdashboard section, choose yourusernamein theUserssection, and then go to theSecurity Credentialstab. - In the
Access keyssection, choose toCreate Access Key.
Press on Download .csv File to save the Access Key ID and Secret Access Key to a file on your computer. After you close the dialog box, you can’t retrieve this secret access key again.
- Copy the
Access Key IDandSecret Access Key, and paste it in the Backup NinjaCloud Credentialssection.
For more information, you can refer to the AWS official documentation.
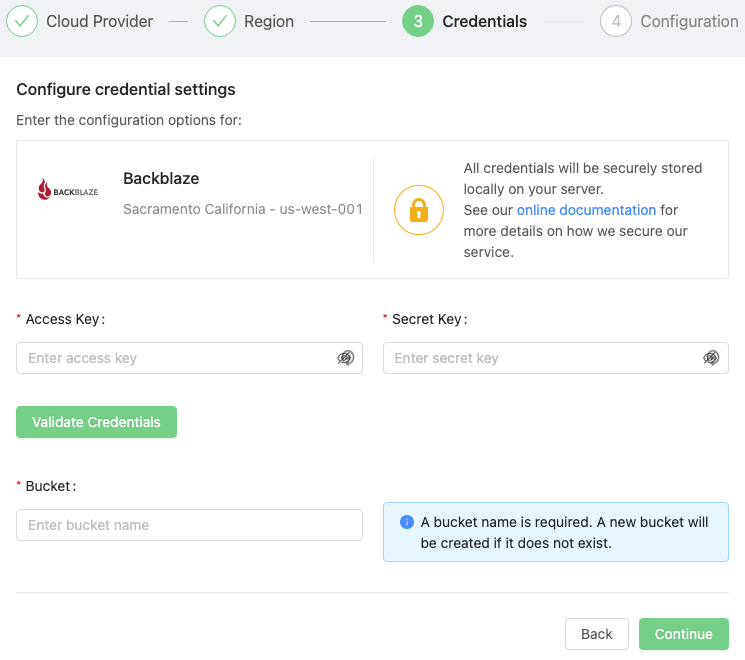
Backblaze
- In the Backblaze site, go to
My Account, and choose theApp Keyssection. - In
Your Applications Keys, press onAdd a New Application Key . - The
keyIDwill be yourAccess Keyand theapplication keywill be yourSecret Keyin Backup Ninja.
Store the keyID and application key in a secure place as it will only appear once in the UI.
- Copy the
keyIDandapplication key, and paste it in the Backup NinjaCloud Credentialssection.
For more information, you can refer to the Backblaze official documentation.
CityCloud
- Go to the CityCloud admin site and create a new
Access KeyandSecret Key.
Copy the generated keys and store it in a secure place.
- Copy the
Access KeyandSecret Key, and paste them in the Backup NinjaCloud Credentialssection.

For more information, you can refer to the CityCloud official documentation.
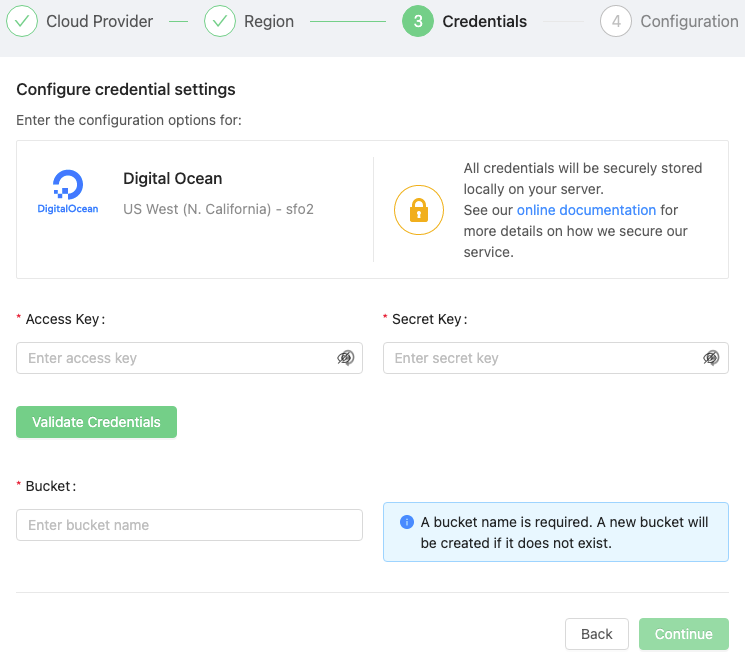
DigitalOcean
- In the DigitalOcean Console, go to
APIunder theAccountsection, and then press onGenerate New Key.
Copy the generated Secret Key and store it in a secure place, as you won’t be able to see it again in the UI.
- Copy the
Access KeyandSecret Key, and paste it in the Backup NinjaCloud Credentialssection.
For more information, you can refer to the DigitalOcean official documentation.
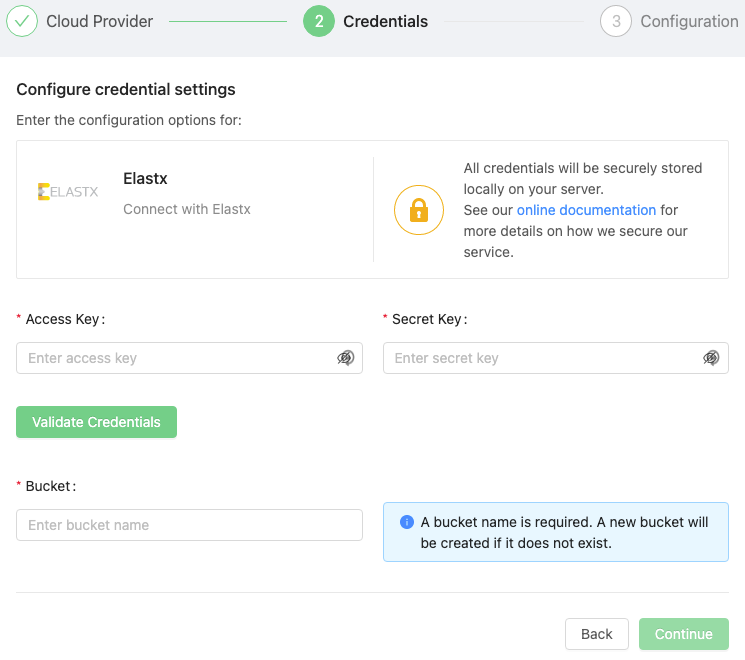
Elastx
- Go to the Elastx site and get the corresponding
Keys.
Copy the generated keys and store them in a secure place.
- Copy the
Access KeyandSecret Key, and paste them in the Backup NinjaCloud Credentialssection.
For more information, you can refer to the Elastx official documentation.
Exoscale
- Go to the Exoscale Portal or use the CLI to create a new
IAM Key.
Copy the generated keys and store them in a secure place.
- Copy the
Access KeyandSecret Key, and paste them in the Backup NinjaCloud Credentialssection.
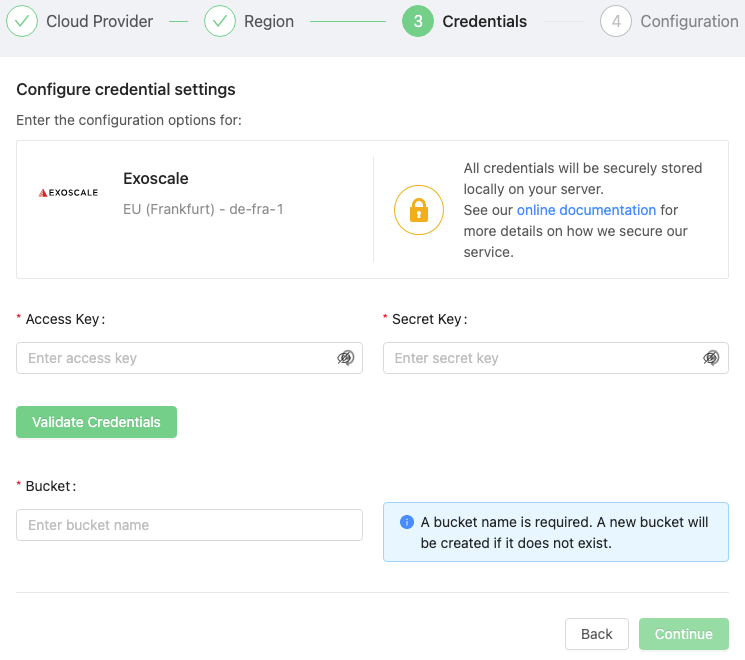
For more information, you can refer to the Exoscale official documentation.
Filebase
- In the Filebase site, go to
Settingswhere you will find the Key to be used in Backup Ninja.
Copy the generated keys and store them in a secure place.
- Copy the
S3 API Access Key IDandS3 API Secret Access Key, and paste it in the Backup NinjaCloud Credentialssection.
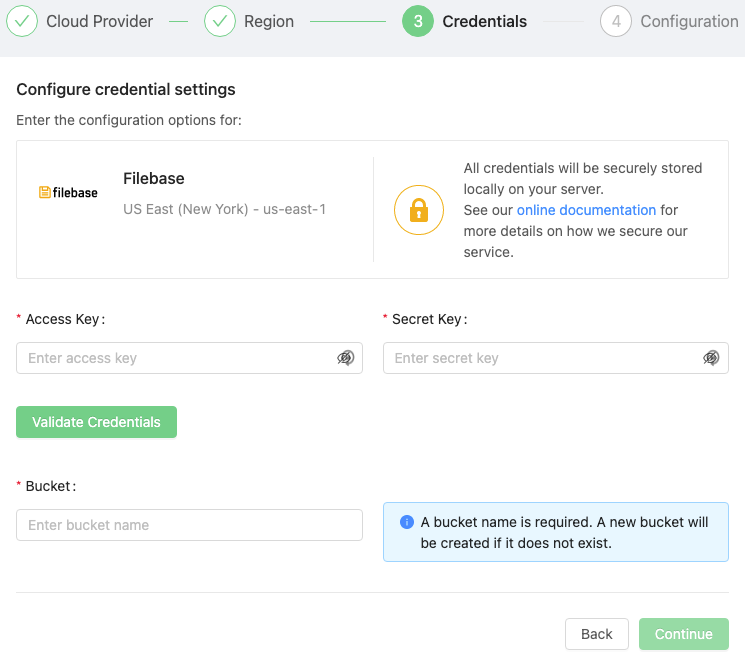
For more information, you can refer to the Filebase official documentation.
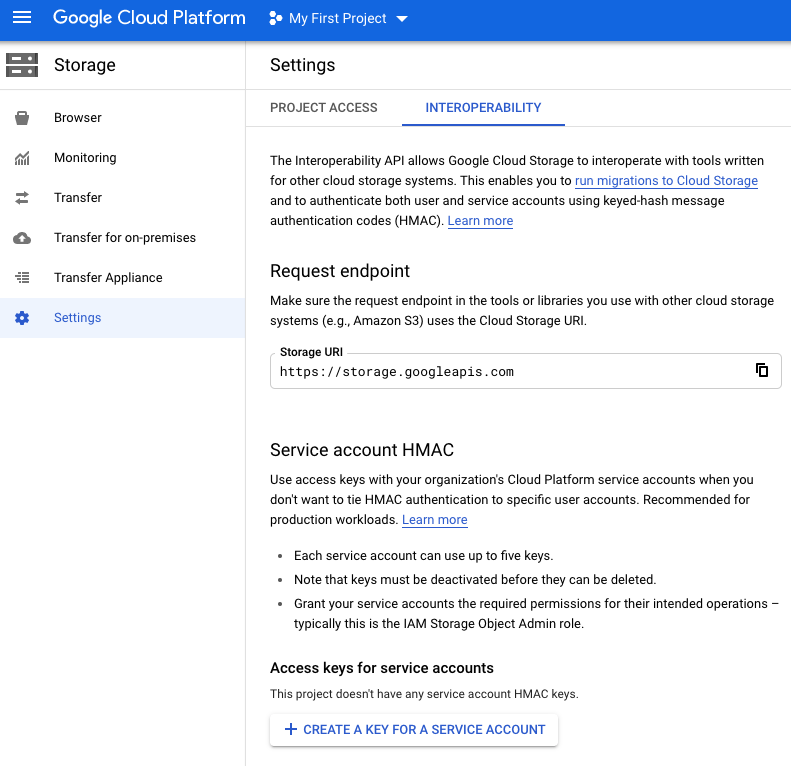
Google Cloud Platform
- In the Google Cloud Platform, go to the
Storagesection,Settings, and finally, choose theInteroperabilitytab. - In the
Service account HMACsection, press onCREATE A KEY FOR A SERVICE ACCOUNT. - Choose an existing
Service Accountor create a new one. - Press on
CREATE A KEY .
Copy the key’s secret in a safe place. Once you close the dialog when you create it, the secret can’t be recovered.
- Copy the
Access KeyandSecret, and paste it in the Backup NinjaCloud Credentialssection.
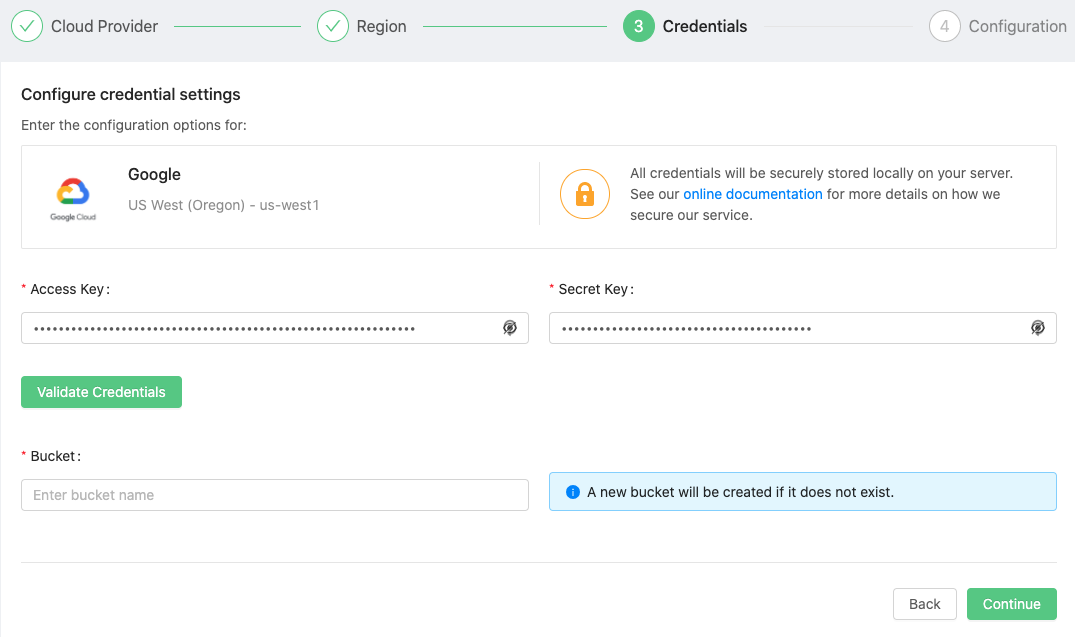
For more information, you can refer to the GCP official documentation.
gridscale
- Go to the gridscale site and get the corresponding
Keys.
Copy the generated keys and store them in a secure place.
- Copy the
Access KeyandSecret Key, and paste them in the Backup Ninja Cloud Credentials section.
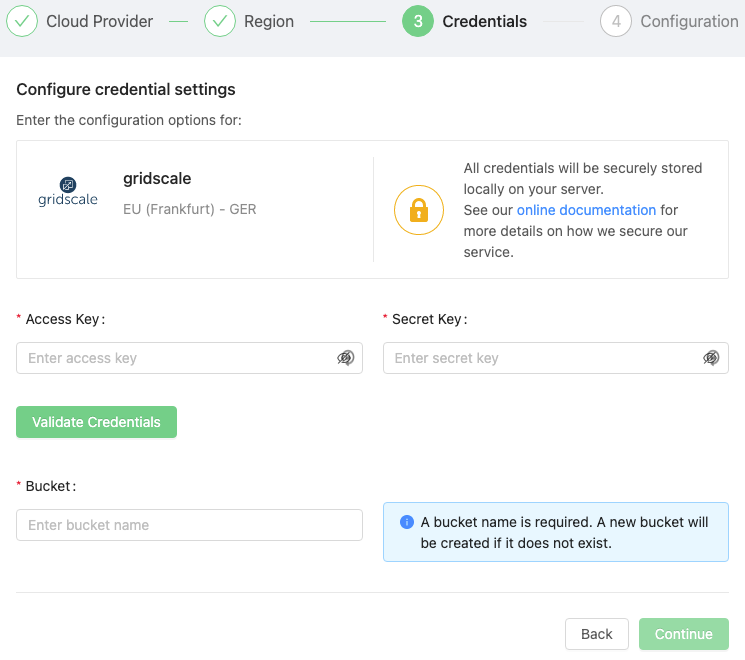
For more information, you can refer to the gridscale official documentation.
Safespring
- Go to the Safespring site and get the corresponding
Keys.
Copy the generated keys and store them in a secure place.
- Copy the
Access KeyandSecret Key, and paste them in the Backup NinjaCloud Credentialssection.
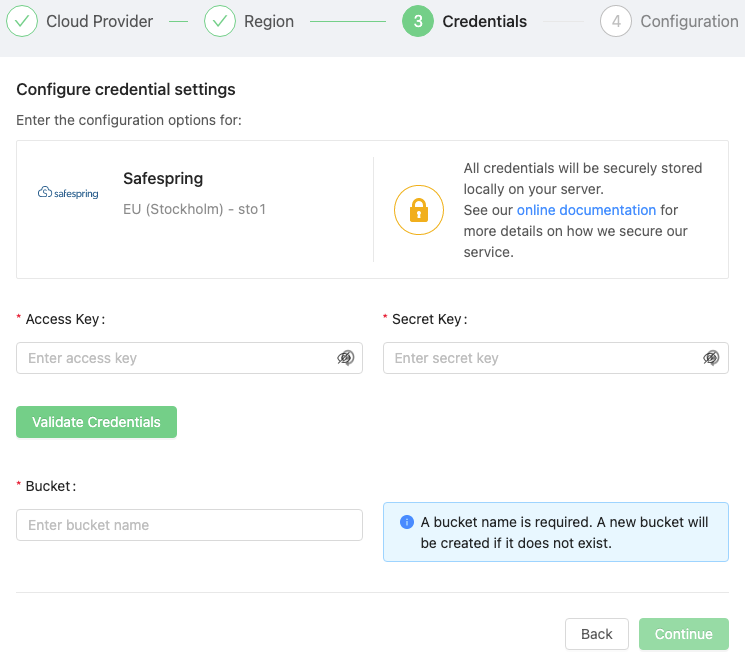
For more information, you can refer to the Safespring official documentation.
Scaleway
- Go to the Scaleway site and get the corresponding
Keys.
Copy the generated keys and store them in a secure place.
- Copy the
Access KeyandSecret Key, and paste them in the Backup NinjaCloud Credentialssection.
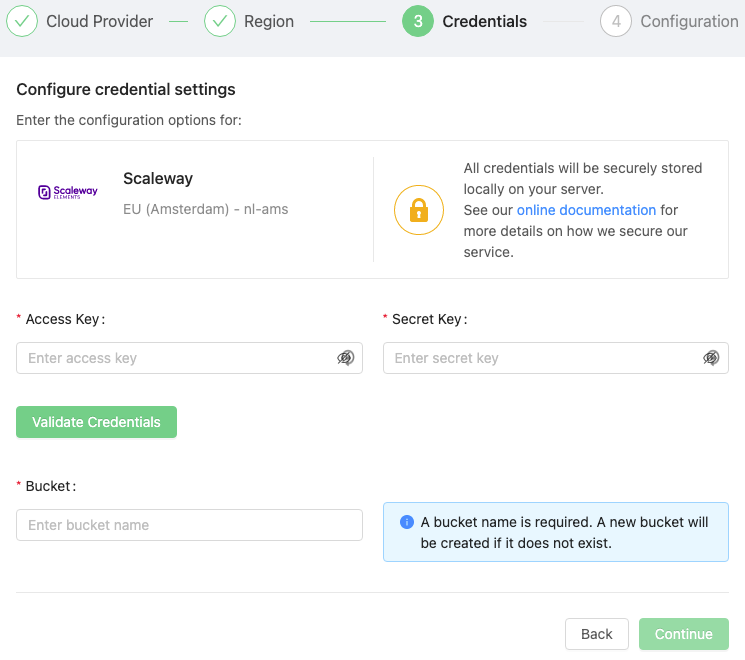
For more information, you can refer to the Scaleway official documentation.
ScanNet
- Go to the ScanNet site and get the corresponding
Keys.
Copy the generated keys and store them in a secure place.
- Copy the
Access KeyandSecret Key, and paste them in the Backup NinjaCloud Credentialssection.
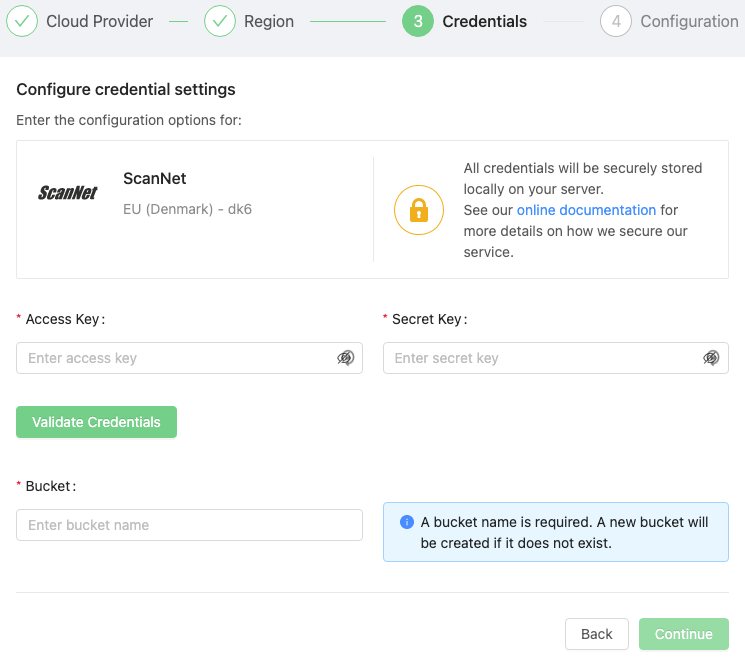
For more information, you can refer to the ScanNet official documentation.
Wasabi
- In the Wasabi Console, go to the
Access Keyssection, and then press onCreate New Access Key . - Select the type of key (root or sub-user) and press on
CREATE .
Download your key file, which contains your new access key and secret access key, and store it in a secure place. You will not be able to retrieve your secret access key again.
- Copy the
Access KeyandSecret Key, and paste them in the Backup NinjaCloud Credentialssection.
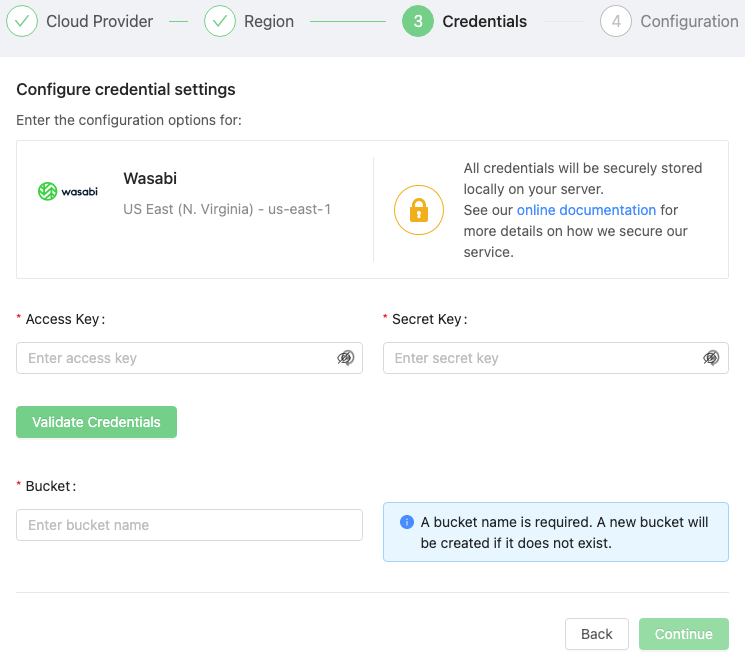
For more information, you can refer to the Wasabi official documentation.