Database Users and Privileges
ClusterControl offers a centralized feature for managing database users and their privileges, providing a comprehensive summary for your cluster. Any changes made through this feature are automatically synchronized across all database nodes in the cluster.
Supported database clusters:
- MySQL/MariaDB replication & standalone
- MySQL/MariaDB Galera Cluster
- MySQL Group Replication
- PostgreSQL/TimescaleDB
- Redis/Valkey
Best practices
When utilizing this feature, adhere to the following recommendations:
- Operational notes:
- Changes made via ClusterControl are applied to all nodes in the cluster
- Privilege changes take effect immediately
- Ensure proper replication state before making user changes
- Security and administration recommendations:
- Avoid granting global privileges unless necessary
- Prefer database-specific privileges for application users
- Regularly audit unused accounts
- Use strong passwords and limit host access
- Do not modify ClusterControl system users unless required
Access the database users management
Log in to your ClusterControl GUI → choose a database cluster → Manage → DB Users (for Redis-based clusters, it is Access Control). You will see a panel where you can view and manage database users and privileges.
The panel view is different depending on the cluster type. See below:
MySQL/MariaDB-based clusters
ClusterControl provides a centralized interface to manage MySQL and MariaDB database users across your cluster. This feature allows administrators to view, create, modify, and audit database users and their privileges directly from the GUI without manual SQL commands.
Info
ClusterControl understands the MySQL/MariaDB topology and creates database users on all nodes where applicable in the cluster. This includes the supported load balancer nodes like ProxySQL.
Common system users for MySQL
ClusterControl automatically manages several system users required for cluster operation:
| User | Purpose |
|---|---|
| cmon | Internal cluster management |
| cmonagent | ClusterControl query monitoring agent |
| backupuser | Database backup and restore |
| cmonexporter | Database metrics collection (Prometheus exporter) |
| proxysql-monitor | ProxySQL monitoring |
| rpl_user | Database replication |
| maxscale | MariaDB MaxScale monitoring |
Warning
Modifying these users may impact cluster functionality.
List MySQL/MariaDB database users
The user list provides a tabular overview of all database users. In the main panel, you can filter the list by filing up the textbox with the magnifying glasss icon.
| Column | Description |
|---|---|
| User | MySQL username and host (e.g., user@host) |
| Active | Indicates whether the account is currently active |
| Privileges | Displays granted privileges |
Click on Refresh instructs ClusterControl to read the database user information for all hosts, and aggregate them in one view.
Privileges are grouped for clarity in boxes. The left-side of the box contains the granted scope of the database objects, for example:
*.*- Global privileges. The granted privilege applies to all databases and all tables.performance_schema- The granted privilege applies to all tables/views for databaseperformance_schema.performance_schema.hosts- The granted privilege applies to table/view ofhosts, under databaseperformance_schema.
The right-side of the box contains the comma-separted list of granted privileges, for example, ALTER, CREATE, ALTER ROUTINE, REPLICATION CLIENT PROCESS and SELECT. Administrative privileges such as GRANT OPTION or PROXY are also shown when applicable.
-
Lists all database users for cluster ID 1:
-
Lists all database users for cluster ID 1, complete with the privileges for every database objects:
-
Show all database users
myappfrom cluster ID 1, complete with their privileges:
-
Get all database user accounts for cluster ID 1, authenticated as ClusterControl user
ccreaderthat has view-only permission level:
Create a MySQL/MariaDB user
-
Click on Create DB User to open the user creation wizard.
-
In the Create database user panel, specify the following:
- Username: Database username.
- Password: Password for Username. The minimum requirement is 4 characters.
- Hostname: Hostname, IP address, or IP address range of the user or client. For the IP address range, use the SQL wildcard
%, for example,192.168.10.%to allow 192.168.10.0/24. - Privileges: Use the statement builder to add more grant statements. Click on Add Privileges to add another grant statement builder for this user.
- Grant: Specify the privilege for this user. If the Privileges text box is active, it list all possible privileges of the server.
- on: Specify the database or table name. It can be in
*.*,{database_name},{database_name}.*or{database_name}.{table_name}format.
- Advanced: Includes fine-grained control over the usage of this user.
- Max Queries Per Hour: Maximum queries this user can perform in an hour. Default is 0 (unlimited).
- Max Updates Per Hour: Maximum update operations this user can perform in an hour. Default is 0 (unlimited).
- Max Connections Per Hour: Maximum connections allowed for this user in an hour. Default is 0 (unlimited).
- Max User Connections: Maximum connections allowed for this user ever. Default is 0 (unlimited).
- Requires SSL: Toggle On if the user must be authenticated using SSL.
-
To create the user, click Create. ClusterControl manages the entire process where it ensures the changes are made on the correct database node (the primary) and any relevant load balancer nodes, and then it propagates the updated user to all other database nodes, including flushing and loading the changes for runtime effect.
-
A toast message will appear on the top-right indicating the status of the user creation. If no error, the user will be listed in the User List view.
-
Create a new MySQL user account called
myuserwith passwordsecr3tP4ss, and allow it to haveALL PRIVILEGESon databaseshop_dbwhileSELECTonly on tableaccount_db.payments:s9s account \ --create \ --cluster-id=1 \ --account="myuser:[email protected]" \ --privileges="shop_db.*:ALL;account_db.payments:SELECT" -
Create a new MariaDB user account called
mydbuseron cluster ID 50, and allow this user to access from all hosts in network 192.168.0.0/24 to databasemydbshop:s9s account \ --create \ --cluster-id=50 \ --account='mydbuser:[email protected].%' \ --privileges="mydbshop.*:ALL" -
Create a new MySQL user account called
myappon cluster ID 1, and create a database with the same namemyappand assign the user withALL PRIVILEGESto the database:s9s account \ --create \ --cluster-id=1 \ --account='myapp:[email protected].%' \ --with-databaseExample
$ s9s account \
    --create \
    --cluster-id=1 \
    --account='myapp:[email protected].%' \
    --with-database

Using plugin ''.
192.168.73.11:3306: Server supports new MySQL authentication syntax. Server has version 8.4.5-5.1.
Account 'myapp' created.
Database 'myapp' created.
Access for 'myapp' to 'myapp' granted.
Importing account on ProxySql host(s).
Created.
-
Create a new database user called
mydbuser2for cluster ID 1 and allow it to access from 192.168.10.0/24 withALL PRIVILEGESfor databasemydb2and SELECT only for databasemyapp, authenticated as ClusterControl userccrpcadminthat has MANAGE permission level:curl -k -XPOST \ -d '{ "operation": "createAccount", "cluster_id": 1, "account": { "user_name": "mydbuser2", "password": "pass123", "host_allow": "192.168.10.%", "grants": "mydb2:ALL;myapp:SELECT" }, "authenticate": { "username": "ccrpcadmin", "password": "mySuperStr0ngP@ssw0rd999" } }' \ https://localhost:9501/v2/clustersInfo
If the same
createAccountoperation is called twice with an identical account information, the latter call will be automatically converted to anALTERoperation (edit an existing database user).
Modify MySQL/MariaDB users
-
Click on the action button ... → Edit to edit an existing user.
-
In the Edit database user panel, specify the following:
- New Password: Password for the database user. The minimum requirement is 4 characters.
- Privileges: Use the statement builder to add more grant statements. Click on Add Privileges to add another grant statement builder for this user.
- Grant: Specify the privilege for this user. If the Privileges text box is active, it list all possible privileges of the server.
- on: Specify the database or table name. It can be in
*.*,{database_name},{database_name}.*or{database_name}.{table_name}format.
- Advanced: Includes fine-grained control over the usage of this user.
- Max Queries Per Hour: Maximum queries this user can perform in an hour. Default is 0 (unlimited).
- Max Updates Per Hour: Maximum update operations this user can perform in an hour. Default is 0 (unlimited).
- Max Connections Per Hour: Maximum connections allowed for this user in an hour. Default is 0 (unlimited).
- Max User Connections: Maximum connections allowed for this user ever. Default is 0 (unlimited).
- Requires SSL: Toggle On if the user must be authenticated using SSL.
-
To modify the user's settings, click Save. ClusterControl manages the entire process where it ensures the changes are made on the correct database node (the primary) and any relevant load balancer nodes, and then it propagates the updated user to all other database nodes, including flushing and loading the changes for runtime effect.
-
A toast message will appear on the top-right indicating the status of the user modification. If no error, the user will be listed in the User List view.
-
List all database users to find the one that you want to edit:
-
Modify an existing database user
'dataadmin'@'%'by adding another MySQL administrative privilege calledPROCESS: -
Reset the password for user
'mydb'@'192.168.73.15'toMySuperDuperS3cureP455w0rd:s9s account \ --create \ --cluster-id=1 \ --account='mydb:[email protected]'Example
$ s9s account \
    --create \
    --cluster-id=1 \
    --account='mydb:[email protected]'

192.168.73.11:3306: Found auth plugin 'caching_sha2_password' for account 'mydb'@'192.168.73.15'.
Updating account 'mydb'@'192.168.73.15'.
192.168.73.11:3306: Alter user processed: ALTER USER 'mydb'@'192.168.73.15' IDENTIFIED WITH caching_sha2_password BY 'xxx xx'
Importing account on ProxySql host(s).
Created.
Info
The
--createflag is capable of updating an existing user, as well as creating a new user if does not exist. -
Modify an existing database user
'user1'@'192.168.10.14'by adding a number of database privileges on tabledb1.reports:s9s account \ --grant \ --cluster-id=1 \ --account='[email protected]' \ --privileges="db1.reports:SELECT,INSERT,UPDATE" -
Modify an existing database user
'user1'@'192.168.10.14'by revokingINSERTandUPDATEdatabase privileges from tabledb1.reports:s9s account \ --revoke \ --cluster-id=1 \ --account='[email protected]' \ --privileges="db1.reports:INSERT,UPDATE"
-
Reset the password for an existing database user
'mydbuser2'@'192.168.73.14'on cluster ID 1 tomySuperSecr3tP455and limit the database user connections to 30, authenticated as ClusterControl usermyrpcadminthat has MANAGE permission level:curl -k -XPOST \ -d '{ "operation": "updateAccount", "cluster_id": 1, "account": { "user_name": "mydbuser2", "password": "mySuperSecr3tP455", "host_allow": "192.168.73.14", "max_user_connections": 30 }, "authenticate": { "username": "myrpcadmin", "password": "mySuperStr0ngP@ssw0rd999" } }' \ https://localhost:9501/v2/clusters -
Modify privileges for an existing database user
'mydbuser2'@'192.168.73.14'on cluster ID 1 by addingDELETEandTRUNCATEto databasetestDB, authenticated as ClusterControl usermyrpcadminthat has MANAGE permission level:curl -k -XPOST \ -d '{ "operation": "grantPrivileges", "cluster_id": 1, "privileges": "testDB.*:DELETE,TRUNCATE", "account": { "user_name": "mydbuser2", "host_allow": "192.168.73.14" }, "authenticate": { "username": "myrpcadmin", "password": "mySuperStr0ngP@ssw0rd999" } }' \ https://localhost:9501/v2/clusters
Drop MySQL/MariaDB users
When dropping a database user, ClusterControl manages the entire process where it ensures the removals are made on the primary database node, or one of the primary nodes if it is a multi-primary cluster.
-
Click on the action button ... → Delete and click Delete to confirm removing an existing user.
-
A toast message will appear on the top-right indicating the status of the user deletion.
-
Drop a database user
'joe'@'%'on cluster ID 1:Tip
If a host value is missing in the
--accountoption, the host value will default to%. -
Drop a database user
'mydb2'@'192.168.40.%'on cluster ID 1:s9s account \ --delete \ --cluster-id=1 \ --account='[email protected].%'
-
Drop a database user
'mydbuser2'@'192.168.73.15'for cluster ID 1, authenticated as ClusterControl usermyrpcadminthat has MANAGE permission level:
Attention
If the database cluster has a ProxySQL load balancer, ClusterControl would create the corresponding user on the ProxySQL as well. Deleting the database user here does not reflect the ProxySQL user. Separate deletion on ProxySQL is necessary for a full user removal.
PostgreSQL-based clusters
Since the release of ClusterControl 2.4.0, you can manage roles, enforce password policies, and configure fine grained permissions (down to the table level) directly from the GUI. It's also improved the user experience and enhanced pg_hba.conf synchronization to ensure consistent security settings across nodes and reduce connectivity issues.
To get started, navigate to Cluster → Manage → DB Users. From there, you can create or modify roles, assign privileges, and adjust password policies through a guided interface.
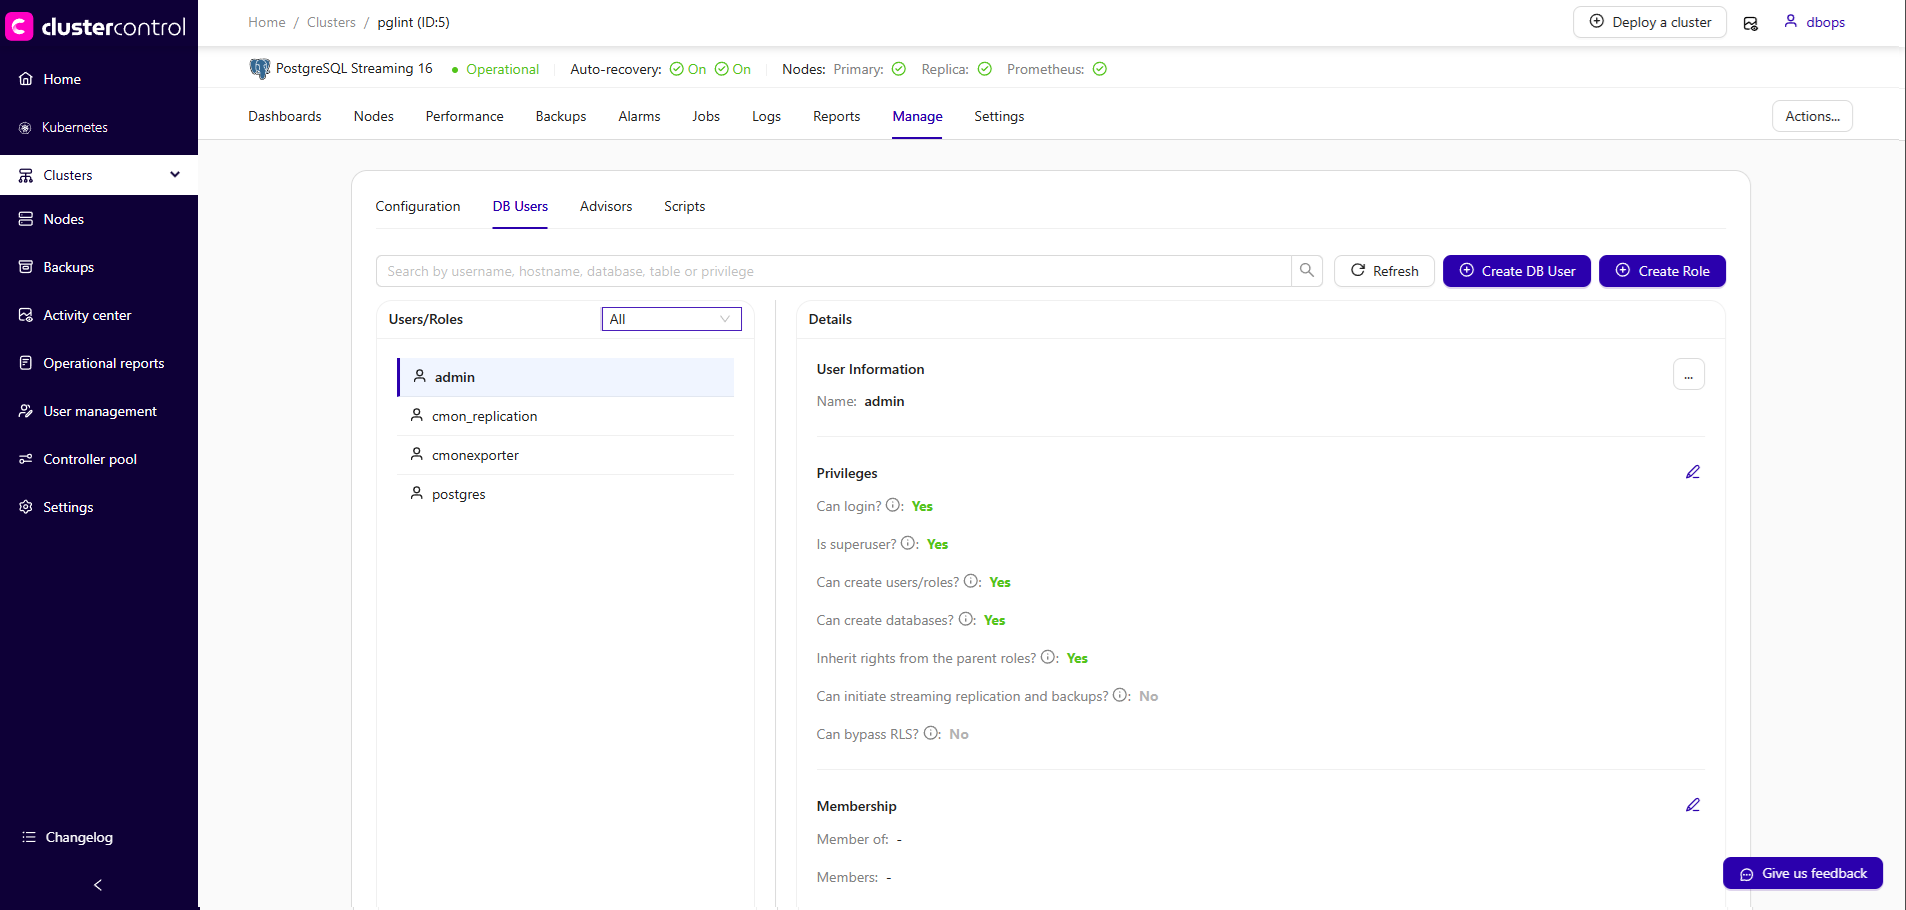
Common system users for PostgreSQL
ClusterControl automatically manages several system users required for cluster operation:
| User | Purpose |
|---|---|
| cmon | Internal cluster management |
| cmonagent | ClusterControl query monitoring agent |
| backupuser | Database backup and restore |
| cmonexporter | Database metrics collection (Prometheus exporter) |
| rpl_user | Database replication |
Warning
Modifying these users may impact cluster functionality.
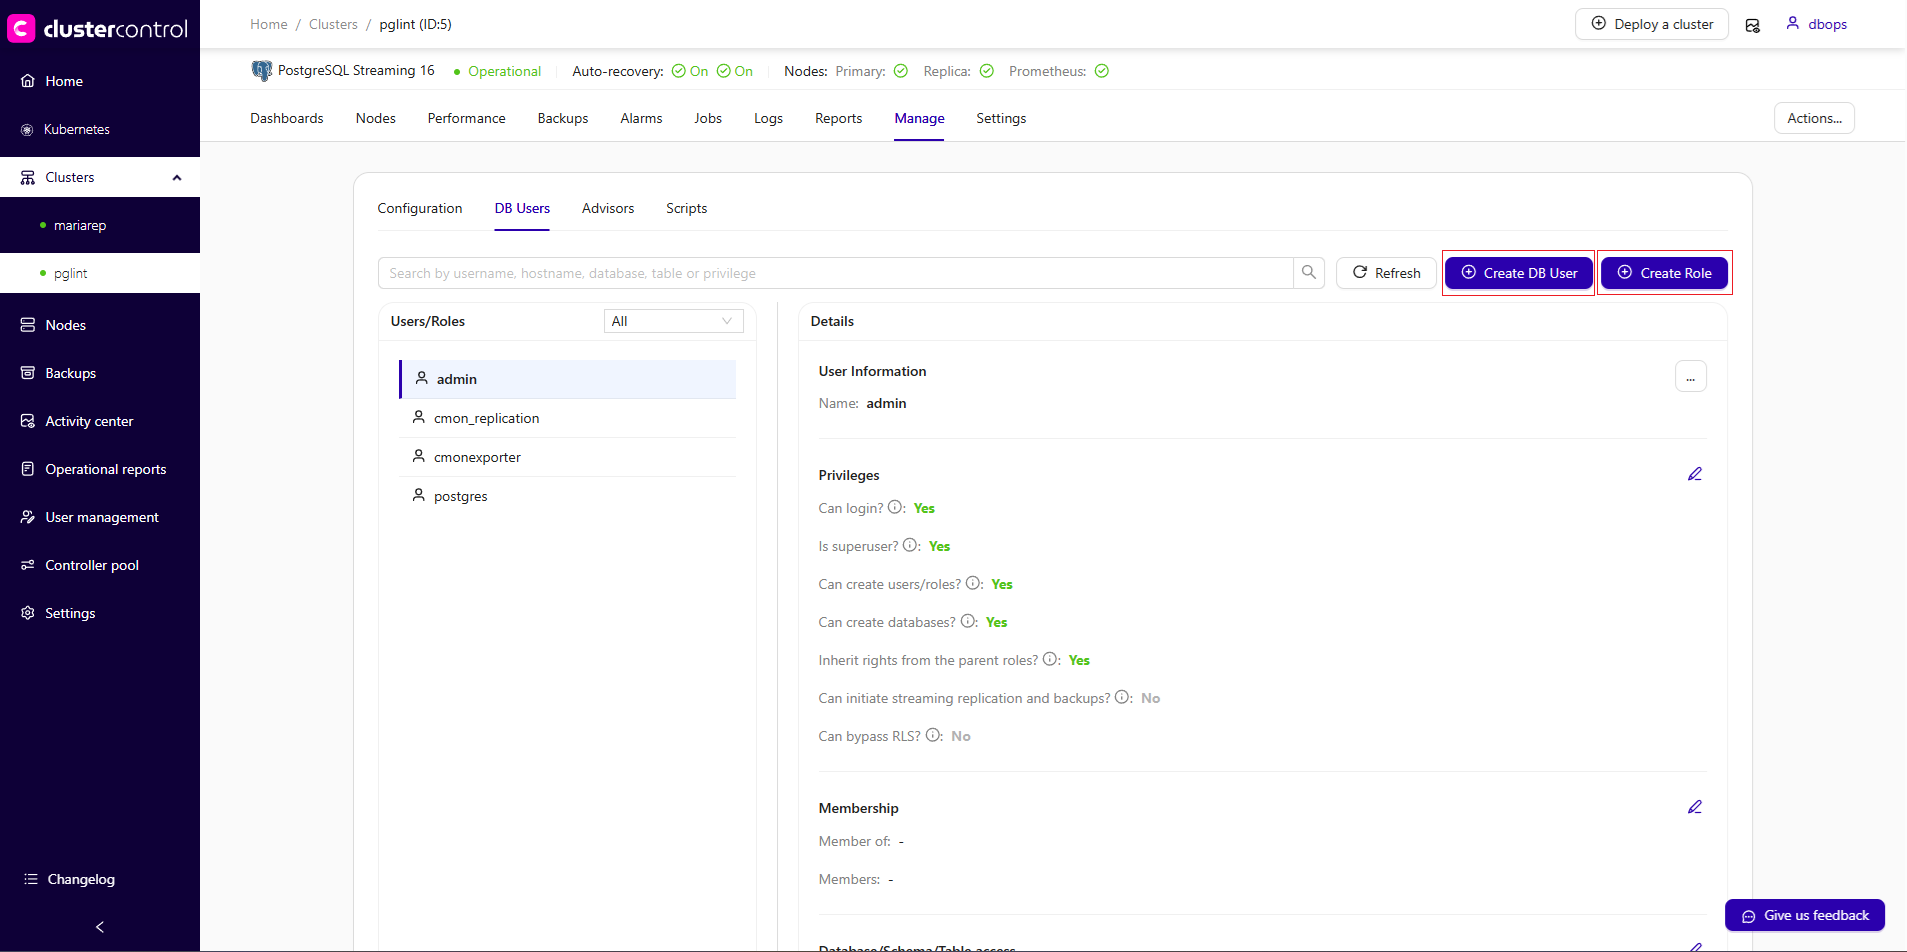
Roles and Users creation
PostgreSQL role and user creation can be fully managed from the GUI. As a best practice, we recommend creating roles first, defining the required privileges at the role level, and then assigning those roles to users. This approach improves access control management, simplifies permission updates, and helps maintain consistency across your PostgreSQL environment.
To create and configure roles or users, go to the DB Users section in ClusterControl, where you can define role attributes, assign privileges, and manage role memberships.
-
On the DB Users menu, click Create Role to create a new role and click Create DB User to create a new user.
-
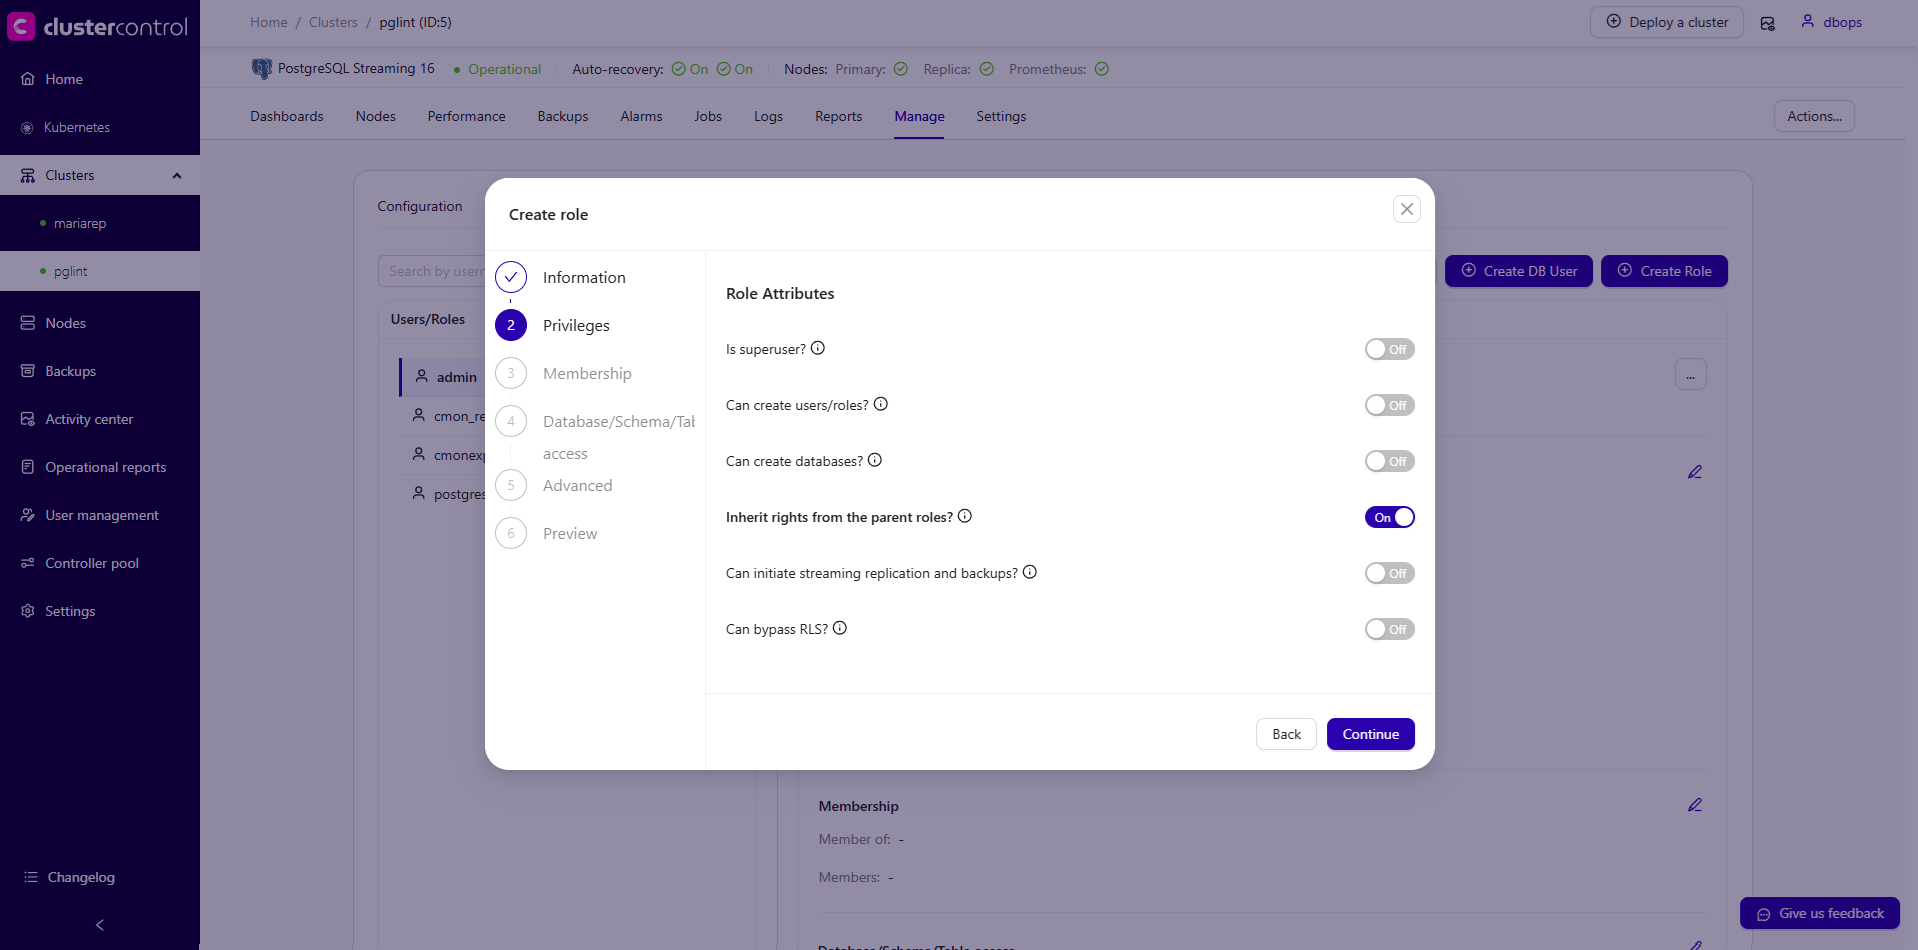
A dialog will appear. Complete the following steps.
- Information
- For role creation, enter the role name in the Role Name input field.
- For user creation, enter the Username and Password in the respective input fields.
-
Role Privileges: Configure the appropriate privileges for the role.
-
Role Membership: Configure role memberships or inheritance as needed. In this section, you can define both "Member of" and "Members" relationships.
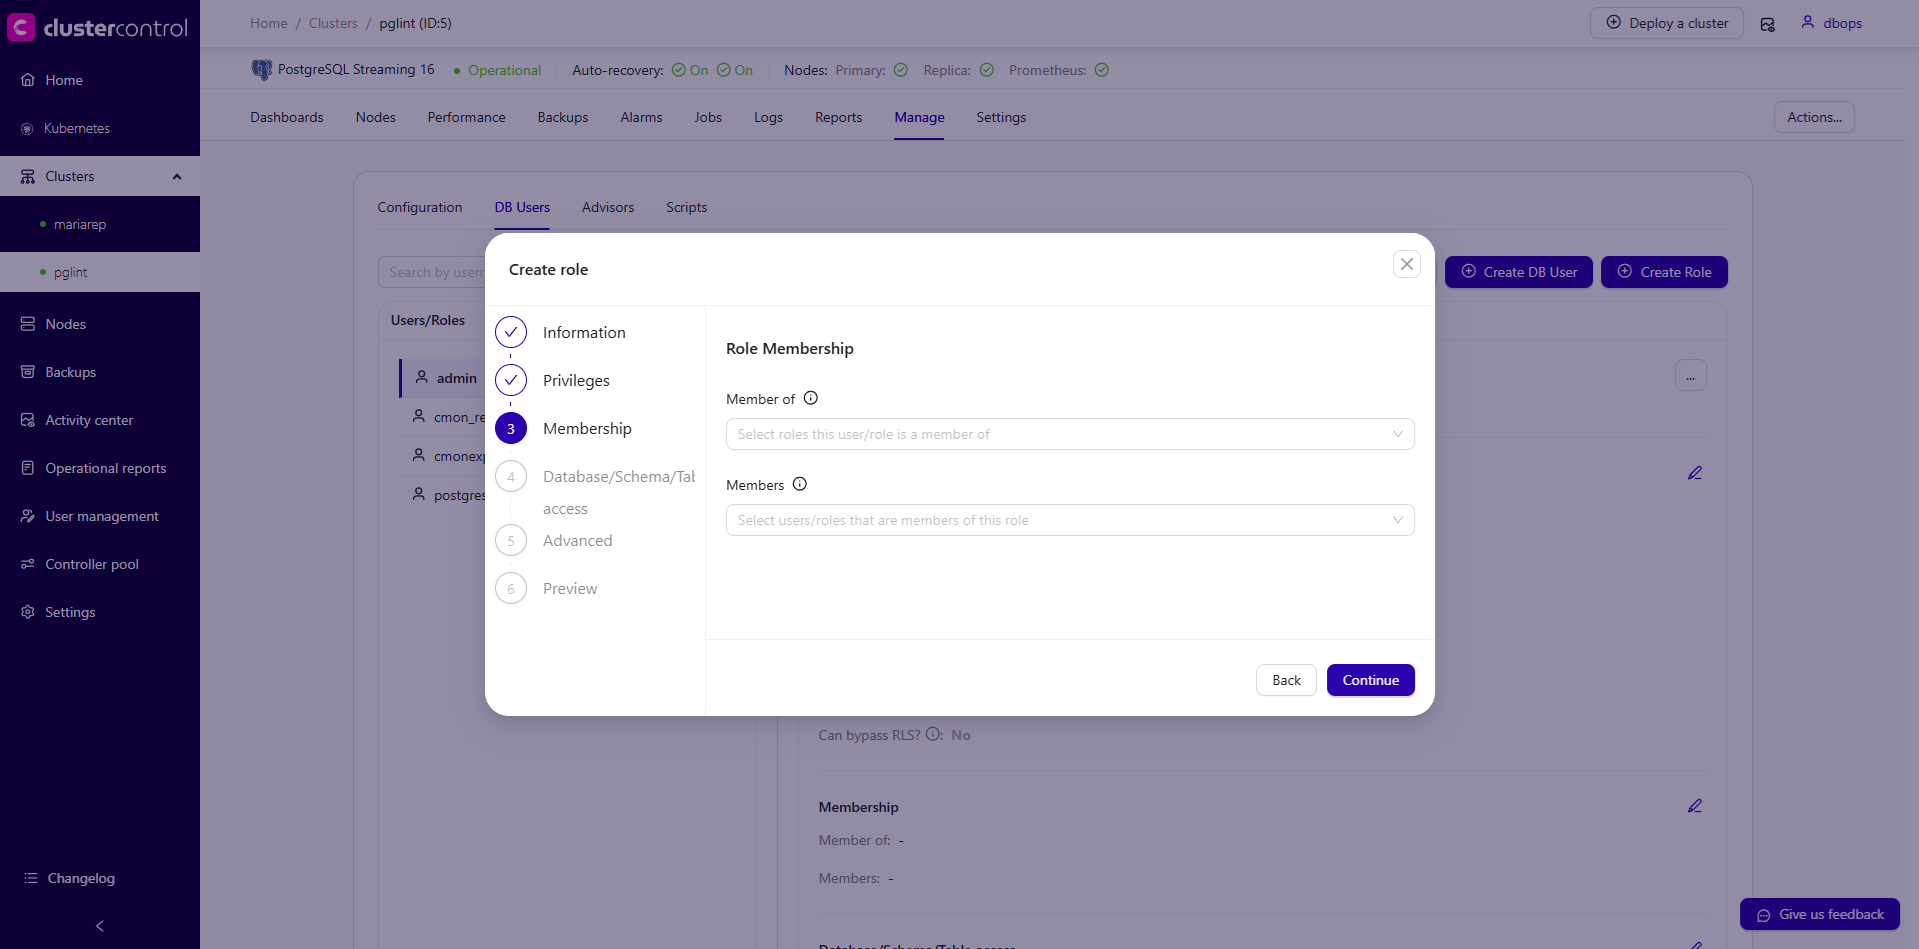
Member of: Assign this role to existing roles so it inherits their privileges.Members: Add other roles or users as members of this role, allowing them to inherit the privileges defined here.
-
Object Access: Configure access at the database, schema, or table level.
-
Advanced: Configure additional options, including pg_hba settings and other advanced parameters.
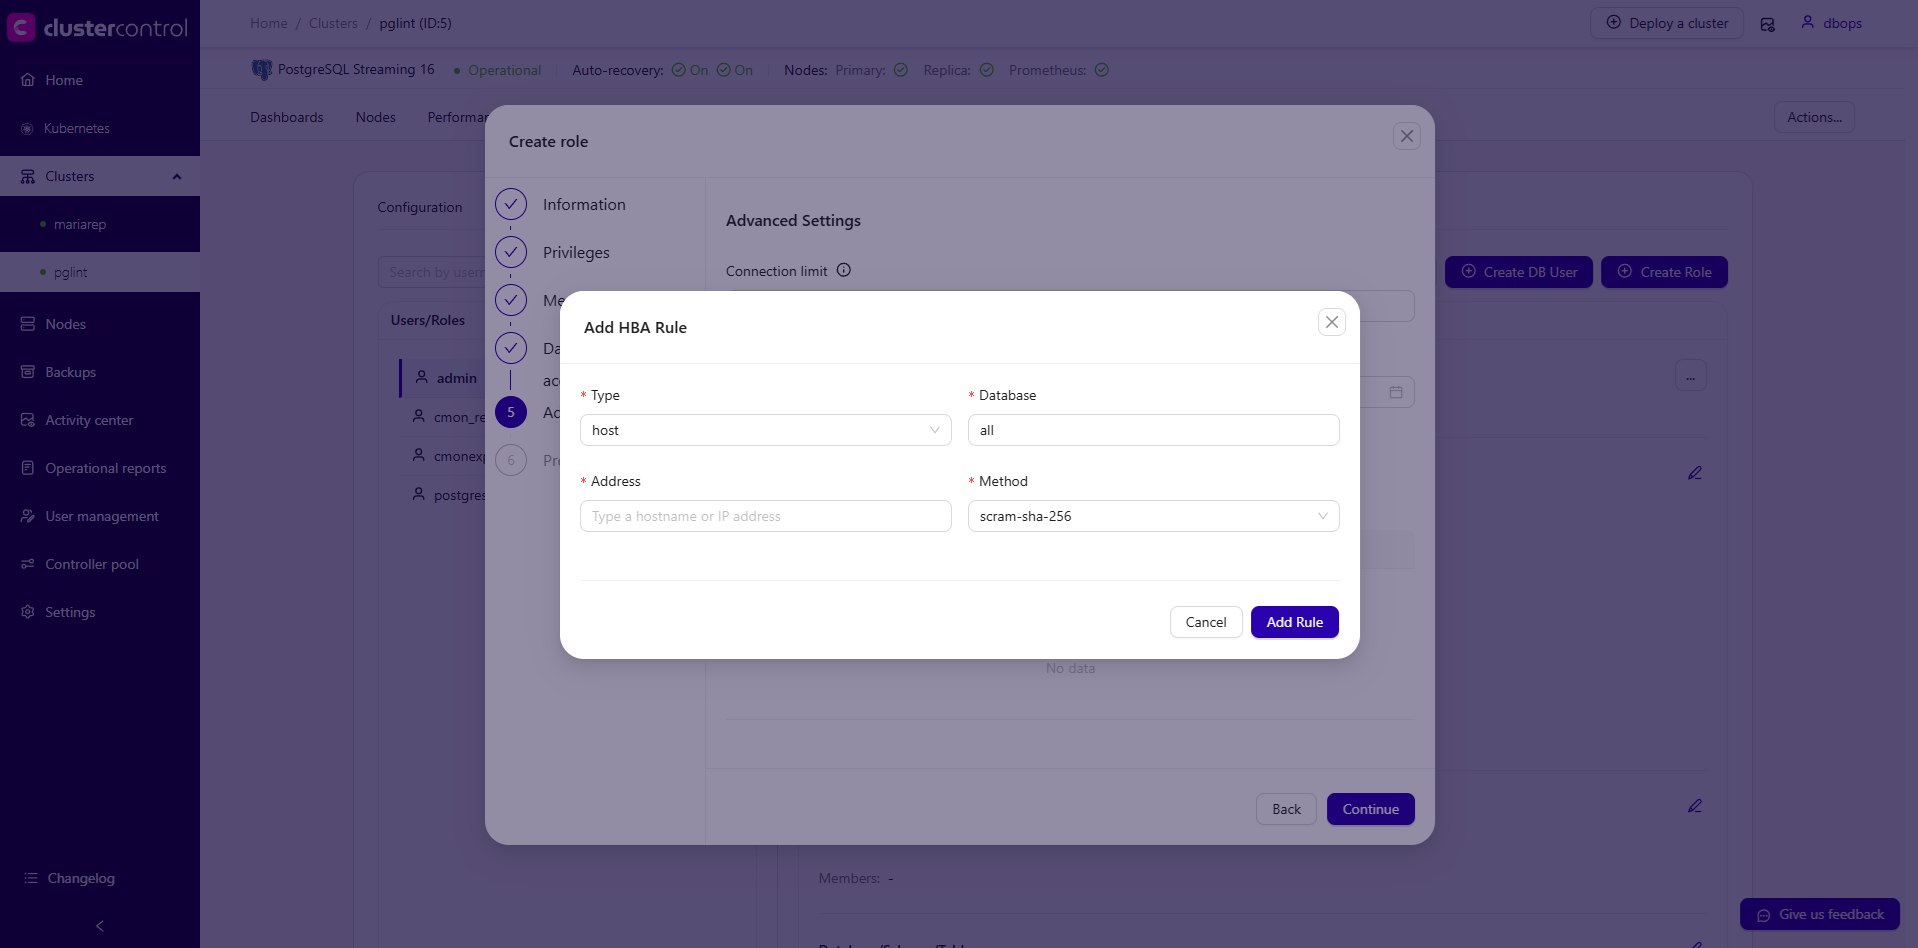
- Type: Specifies the connection type. Common options:
host: Matches TCP/IP connections (IPv4 and IPv6) and standard network connectionshostssl: Matches TCP/IP connections that require SSL/TLSlocal: Matches Unix socket connections (local machine only)
- Database: Specifies which database(s) the rule applies to.
all: Applies to all databases (default)- A specific database name (for example:
postgres,template1,product)
- Address: Defines the client source address allowed to connect. Supported formats:
- Single IP address (
10.10.0.25/32) - Subnet or CIDR notation (
10.10.0.0/24) - All IPv4 addresses (
0.0.0.0/0): not recommended - IPv6
- Single IP address (
-
Method: Specifies the authentication method used to validate client connections. Common methods:
Method Description Typical Use Case Security Level trustAllows connection without authentication. Testing or internal environments only. Not secure rejectExplicitly denies a connection attempt. Blocking specific IPs or subnets. - scram-sha-256Secure password-based authentication using SCRAM. Recommended for production environments. High md5Legacy password authentication using MD5 hashing. Backward compatibility with older clients. Medium passwordSends password in clear text (use only with SSL). Legacy systems requiring plain password auth. Low (without SSL) gssUses GSSAPI (Kerberos). Enterprise environments with Kerberos SSO. High sspiWindows SSPI authentication (Active Directory). Windows domain environments. High identUses ident protocol to verify OS user over TCP/IP. Legacy or controlled internal networks. Low Medium peerAuthenticates based on matching OS user (Unix socket only). Local Linux connections. High (local only) ldapAuthenticates against an LDAP server. Centralized enterprise authentication. High (depends on LDAP config) radiusUses a RADIUS server for authentication. Enterprise centralized authentication. High certUses SSL client certificate authentication. High security environments requiring mutual TLS. Very High pamUses Pluggable Authentication Modules (PAM). Linux systems integrating with system authentication. High (depends on PAM setup)
- Type: Specifies the connection type. Common options:
-
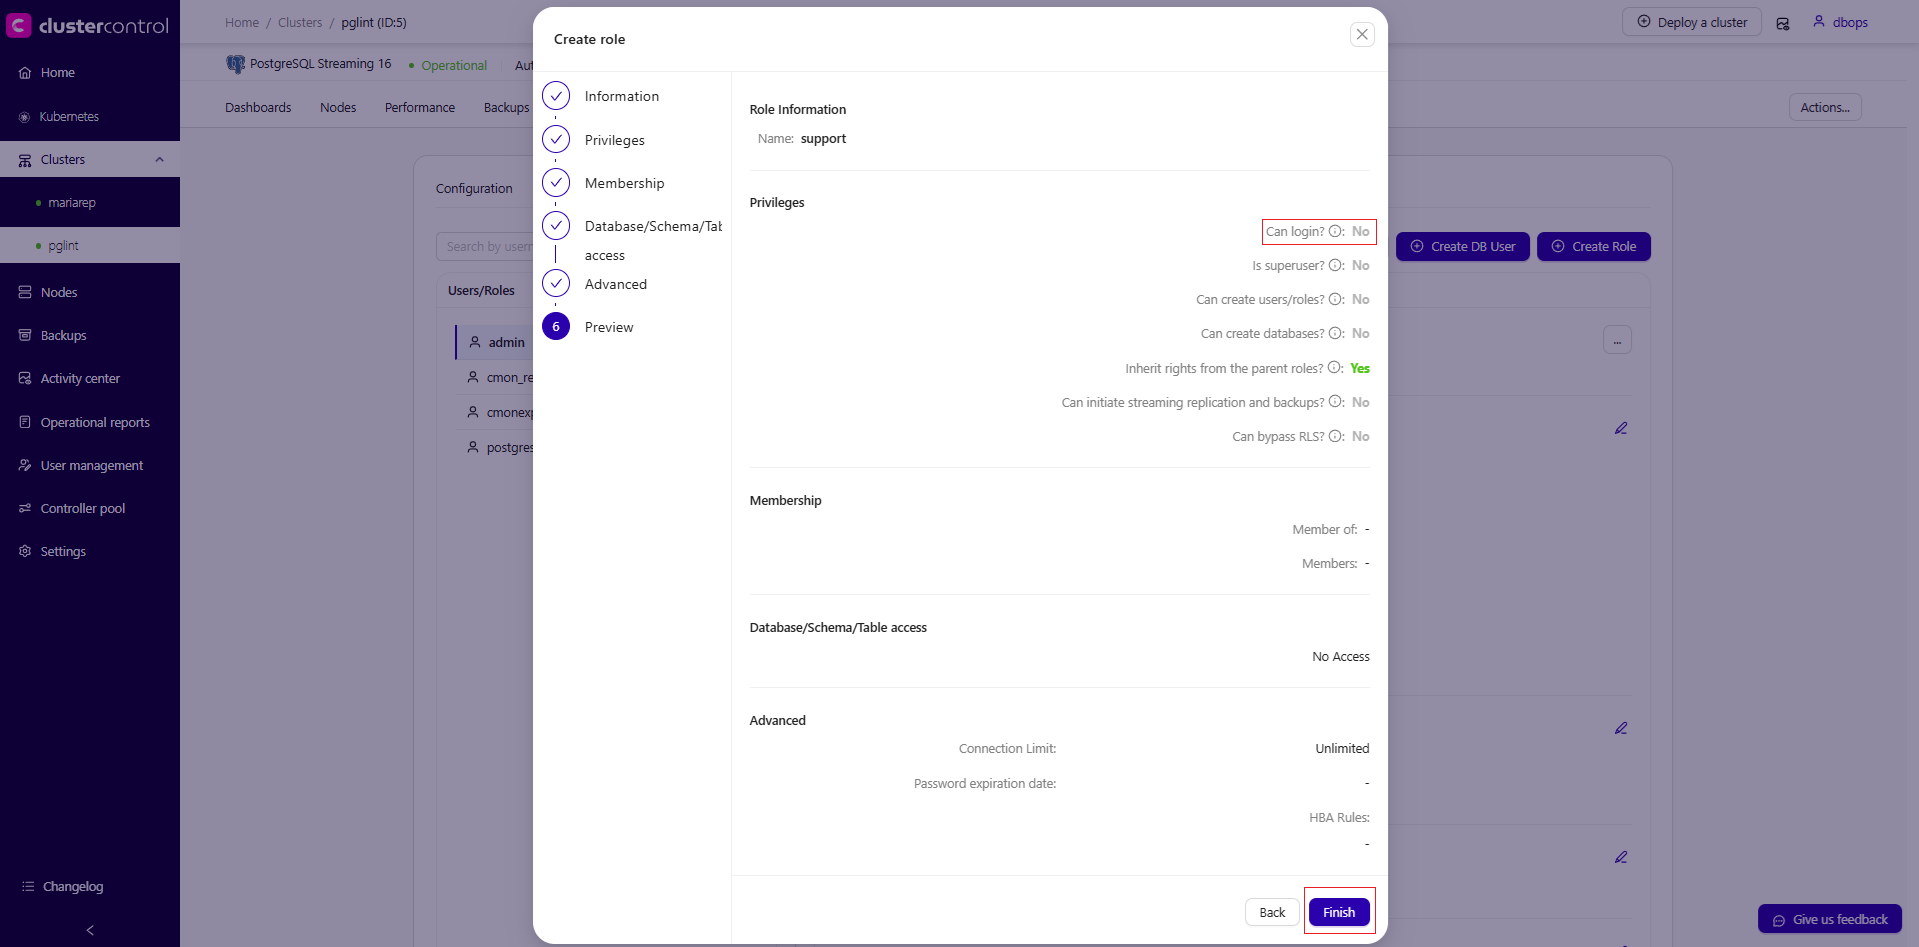
Lastly, review the configuration before clicking the Finish button in the Preview section.
Create a new PostgreSQL role called vendor, and allowed the host in the network subnet 10.10.20.0/24 to access the database postgres with readonly privilege:
s9s account \
    --create \
    --cluster-id=5 \
    --account='[email protected]/24' \
    --privileges="postgres.*:SELECT"
Create a new PostgreSQL user called vender_abc
The difference between a Role and a User in s9s cli is the password. During creation, an account created with a password will be flagged as a User, while an account created without a password will be flagged as a Role.
This request creates a role or user in PostgreSQL User Management (v2). For example, it creates a role named vendor with allowed host 10.10.20.0/24 and readonly privileges on tables in the postgres database.
curl -k -XPOST \
-d '{
    "cluster_id": 5,
    "operation": "createAccount",
    "account": {
    "class_name": "CmonAccount",
    "user_name": "vendor",
    "ssl_type": "NONE",
    "max_user_connections": 0,
    "max_questions": 0,
    "max_updates": 0,
    "max_connections": -1,
    "member_of": [],
    "members": [],
    "allowed_hosts": [
        {
        "type": "host",
        "database": "all",
        "user": "vendor",
        "address": "10.10.20.0/24",
        "method": "scram-sha-256",
        "inherited": false
        }
    ],
    "grants": "NOSUPERUSER,NOLOGIN,INHERIT,NOCREATEROLE,NOCREATEDB,NOREPLICATION,NOBYPASSRLS;postgres.*:SELECT"
    },
    "authenticate": {
    "username": "myrpcusr",
    "password": "mySuperStr0ngP@ssw0rd999"
    }
}' \
https://10.10.15.100:9501/v2/clusters
Note
Roles created from the UI cannot log in to the database by default. You can verify this in the Preview section, where it shows: Can login? : No
Roles and Users modification
After creating roles and users, you can modify them as needed. This includes changing passwords, updating privileges (LOGIN, SUPERUSER, CREATEDB, CREATEROLE), managing role memberships, and updating pg_hba.conf policies.
To make changes, navigate to the management section in the UI.
- Navigate to Cluster → Manage → DB Users.
- Select the role or user you want to modify.
- Click on the action button ... → Edit or click the edit (pencil) icon on each section.
- Modify the user or role. (for example, modifying the user
ops_1and attaching thesupportrole to the user)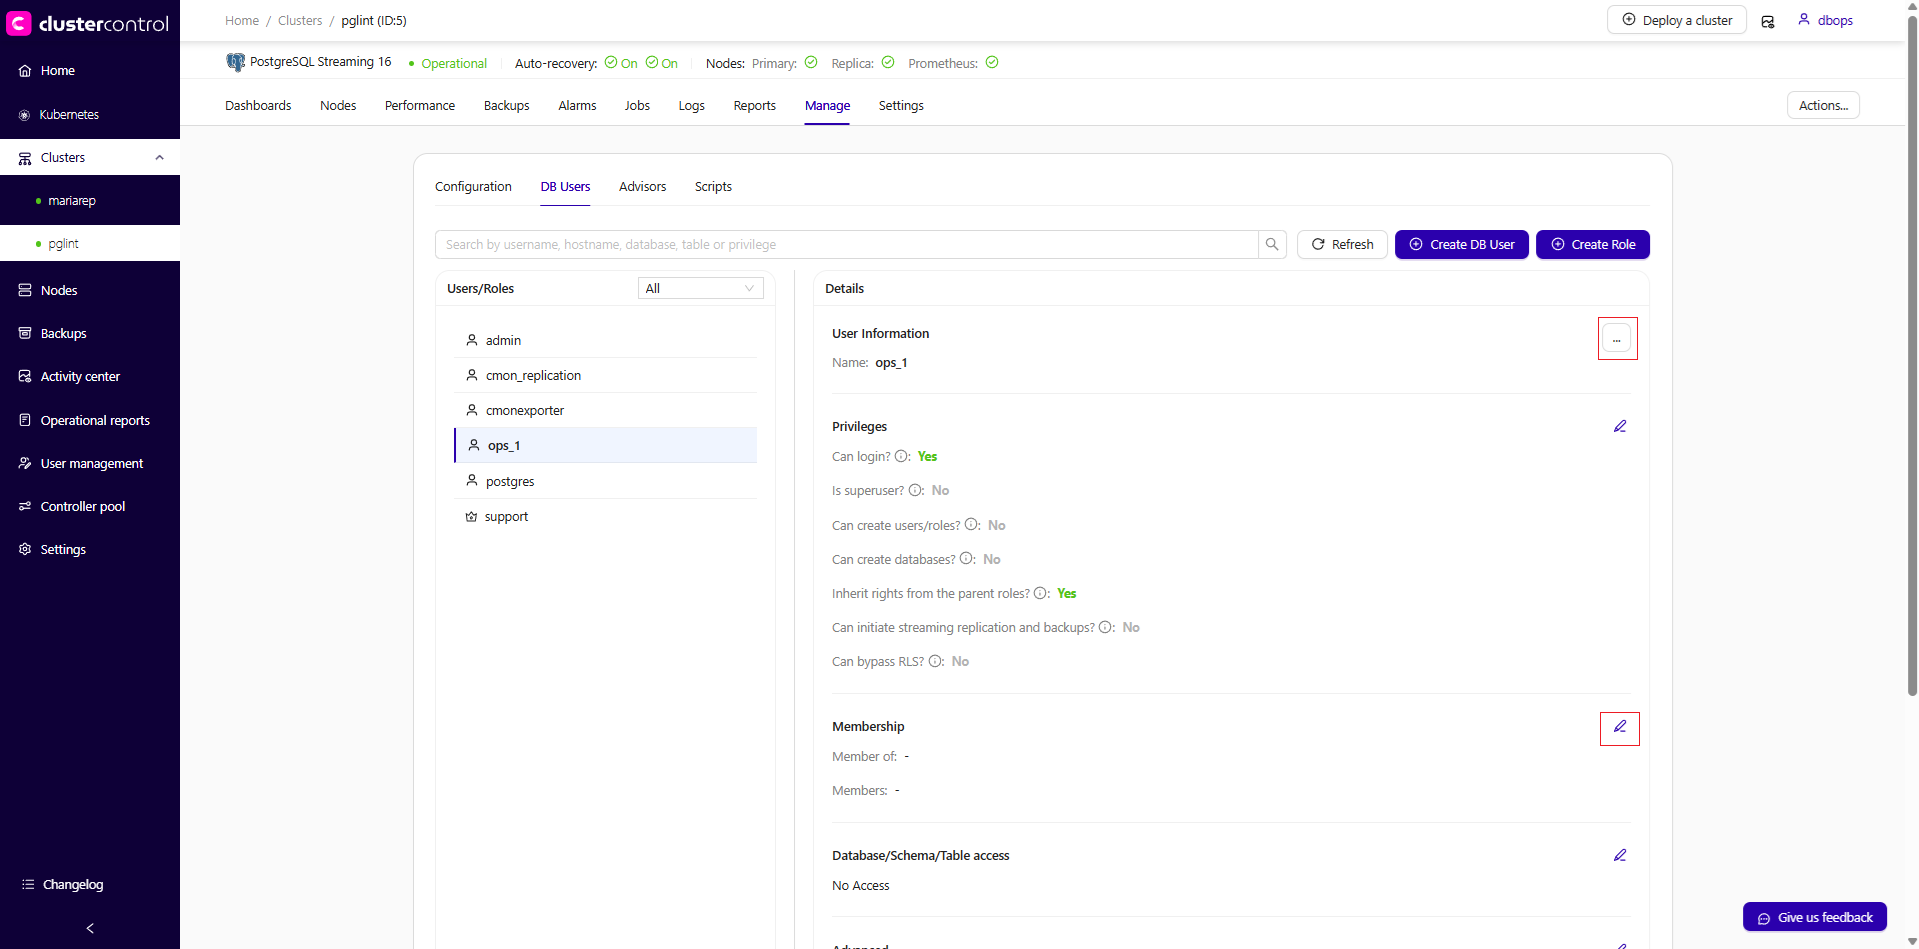
- Review the changes and ensure everything is correct
- Click Save to apply the updates.
Coming soon (To be updated once available)
This request modifies a role or user in PostgreSQL User Management (v2). For example, it modifies user vendor_abc to become a member of role vendor.
curl -k -XPOST \
-d '{
    "cluster_id": 5,
    "operation": "updateAccount",
    "account": {
    "class_name": "CmonAccount",
    "user_name": "vendor_abc",
    "ssl_type": "NONE",
    "max_connections": -1,
    "member_of": [
        {
        "name": "vendor",
        "with_admin": false
        }
    ],
    "members": [],
    "grants": "NOSUPERUSER,LOGIN,INHERIT,NOCREATEROLE,NOCREATEDB,NOREPLICATION,NOBYPASSRLS"
    },
    "authenticate": {
    "username": "myrpcusr",
    "password": "mySuperStr0ngP@ssw0rd999"
    }
}' \
https://10.10.15.100:9501/v2/clusters
Redis-based clusters
The Access Control feature in ClusterControl for Redis-based clusters (including Valkey cluster, Redis Sentinel and Valkey Sentinel setups) allows administrators to manage Redis ACL users, permissions, and security policies. This functionality is built upon Redis's native permissions and Access Control List (ACL) mechanism, which is detailed in the Redis documentation and Valkey documentation. For ClusterControl command-line users, the same management features are accessible via the account command.
This feature simplifies the configuration of Redis authentication and authorization by providing a centralized interface to define:
- Users
- Command permissions
- Key access patterns
- Channel access
- Categories
Common system users for Redis
ClusterControl automatically manages several system users required for Redis/Valkey cluster operation:
| User | Purpose |
|---|---|
| default | Default Redis user |
| replica-user | Database replication |
| sentinel-user | Redis/Valkey Sentinel user for failover coordination |
Warning
Modifying these users may impact cluster functionality.
View Access Control List (ACL)
The access control list provides a tabular overview of all database users. In the main panel, you can filter the list by filing up the textbox with the magnifying glasss icon.
The ACL table displays the following information for each user:
| Field | Description |
|---|---|
| User | Redis ACL username |
| Status | Whether the user is enabled or disabled |
| Categories | Command categories assigned (e.g., +@all, -@all) |
| Channels | Pub/Sub channel access patterns |
| Keys | Key pattern access (e.g., ~*) |
| Commands | Specific allowed commands (e.g., +get, +set) |
Click on Refresh instructs ClusterControl to read the database user information for all hosts, and aggregate them in one view.
Create a Redis user
-
Click on Create ACL rule to open the user creation wizard.
-
In the Create ACL rule panel, specify the following:
- Username: Database username. This field is mandatory.
- Password: Password for Username. If no password is specified user will be set with
nopassspecial string. It means that it will be possible to authenticate as such user with any password. - Categories: Predefined groups of commands in Redis ACLs used to manage user permissions. Examples include
+@adminfor administrative commands,+@readfor read-only commands, and+@writefor write commands. This field is mandatory. - Channels: Custom channels in Redis Pub/Sub messaging that users can be allowed or denied access to via ACLs. Channels facilitate the broadcasting of messages to multiple subscribers.
- Keys: Custom channels in Redis Pub/Sub messaging that users can be allowed or denied access to via ACLs. Channels facilitate the broadcasting of messages to multiple subscribers.
- Commands: Specific Redis commands that users can be allowed or denied access to in ACLs. Commands perform various operations such as setting values (
set), retrieving data (get) or deleting keys (del). Prefix the command with plus '+' to allow or '-' to deny.
-
To create the user, click Create. ClusterControl manages the entire process where it ensures the changes are made on the correct database node (the primary), and ensure the user is propagated to all other database nodes.
-
A toast message will appear on the top-right indicating the status of the user creation. If no error, the user will be listed in the list view.
-
Create a new Redis user account called
cache1with passwordsecr3tP4sson cluster ID 4, and allow this user all commands except the dangerous ones for all channels (&*) and keys(~*): -
Create a new non-password Redis user called
nopassuseron cluster ID 4, and allow this user to run all list-related commands on all channels and keys:
-
Create a new Redis user called
mycachefor cluster ID 1 and allow this user to run all admin-related commands except the dangerous ones on all keys and channels, authenticated as ClusterControl userccrpcadminthat has MANAGE permission level:curl -k -XPOST \ -d '{ "operation": "createAccount", "cluster_id": 1, "account": { "user_name": "mycache", "password": "passW0rd123", "host_allow": "%", "grants": "+@admin -@dangerous" }, "authenticate": { "username": "ccrpcadmin", "password": "mySuperStr0ngP@ssw0rd999" } }' \ https://localhost:9501/v2/clustersInfo
If the same
createAccountoperation is called twice with an identical account information, the latter call will be automatically converted to anALTERoperation (edit an existing database user).
Modify Redis users
-
Click on the action button ... → Edit to edit an existing ACL rule.
-
In the Edit ACL rule panel, specify the following:
- Password: New password for the user. If no password is specified user, the current password will be kept. If you want to set the user without password (with
nopassspecial string), create a new user with blank password instead. - Categories: Predefined groups of commands in Redis ACLs used to manage user permissions. Examples include
+@adminfor administrative commands,+@readfor read-only commands, and+@writefor write commands. This field is mandatory. - Channels: Custom channels in Redis Pub/Sub messaging that users can be allowed or denied access to via ACLs. Channels facilitate the broadcasting of messages to multiple subscribers.
- Keys: Custom channels in Redis Pub/Sub messaging that users can be allowed or denied access to via ACLs. Channels facilitate the broadcasting of messages to multiple subscribers.
- Commands: Specific Redis commands that users can be allowed or denied access to in ACLs. Commands perform various operations such as setting values (
set), retrieving data (get) or deleting keys (del). Prefix the command with plus '+' to allow or '-' to deny.
- Password: New password for the user. If no password is specified user, the current password will be kept. If you want to set the user without password (with
-
To modify the user's settings, click Save. ClusterControl manages the entire process where it ensures the changes are made on the correct database node (the primary), and ensure the user is propagated to all other database nodes.
-
A toast message will appear on the top-right indicating the status of the user modification. If no error, the user will be listed in the User List view.
-
List all database users to find the one that you want to edit:
-
Modify an existing database user
dataadminby allowing administrative commands called@admin: -
Reset the password for user
mydbtoMySuperDuperS3cureP455w0rd:Info
The
--createflag is capable of updating an existing user, as well as creating a new user if does not exist.
-
Reset the password for an existing database user
mydbuseron cluster ID 1 tomySuperSecr3tP455, authenticated as ClusterControl usermyrpcadminthat has MANAGE permission level: -
Modify privileges for an existing database user
mydbuser2on cluster ID 1 by allowing@adminand denying@dangerouscommands to all databases, authenticated as ClusterControl usermyrpcadminthat has MANAGE permission level:
Drop Redis users
When dropping a database user, ClusterControl manages the entire process where it ensures the removals are made on the primary database node, or one of the primary nodes if it is a multi-primary cluster.
-
Click on the action button ... → Delete and click Delete to confirm removing an existing user.
-
A toast message will appear on the top-right indicating the status of the user deletion.
-
Drop a Redis user 'mycache' for cluster ID 1, authenticated as ClusterControl user
myrpcadminthat has MANAGE permission level: